Nature Connection: Hapa Zome.
The magical art of “hapa zome” — plant pounding, leaf dyeing, eco printing — is a simple, seasonal and local activity to try. For adults and children alike, it’s a space for experimentation and play.
This blog introduces you to a personal approach to this botanical printing activity of hapa zome.
What is hapa zome?
Some say it is an ancient or traditional Japanese technique, some say botanical printer India Flint invented the term on a trip to Japan. Personally, I use “hapa zome” as a really easy SEO win — the term is come across quite readily today and people know what to expect. And though I do feel uncomfortable appropriating something with a cultural name, I like to embed the slowness evoked from any Japanese craft into the plant printing. Hapa zome to me is the act, while the plant print is the outcome.
I’ve also seen it noted as tataki zome — this being the leaf version, while hapa zome is the flower printing. Like I said, people know the term and so, whatever you decide to call it, it’s already an encouragement to connect seasonally and locally with nature.


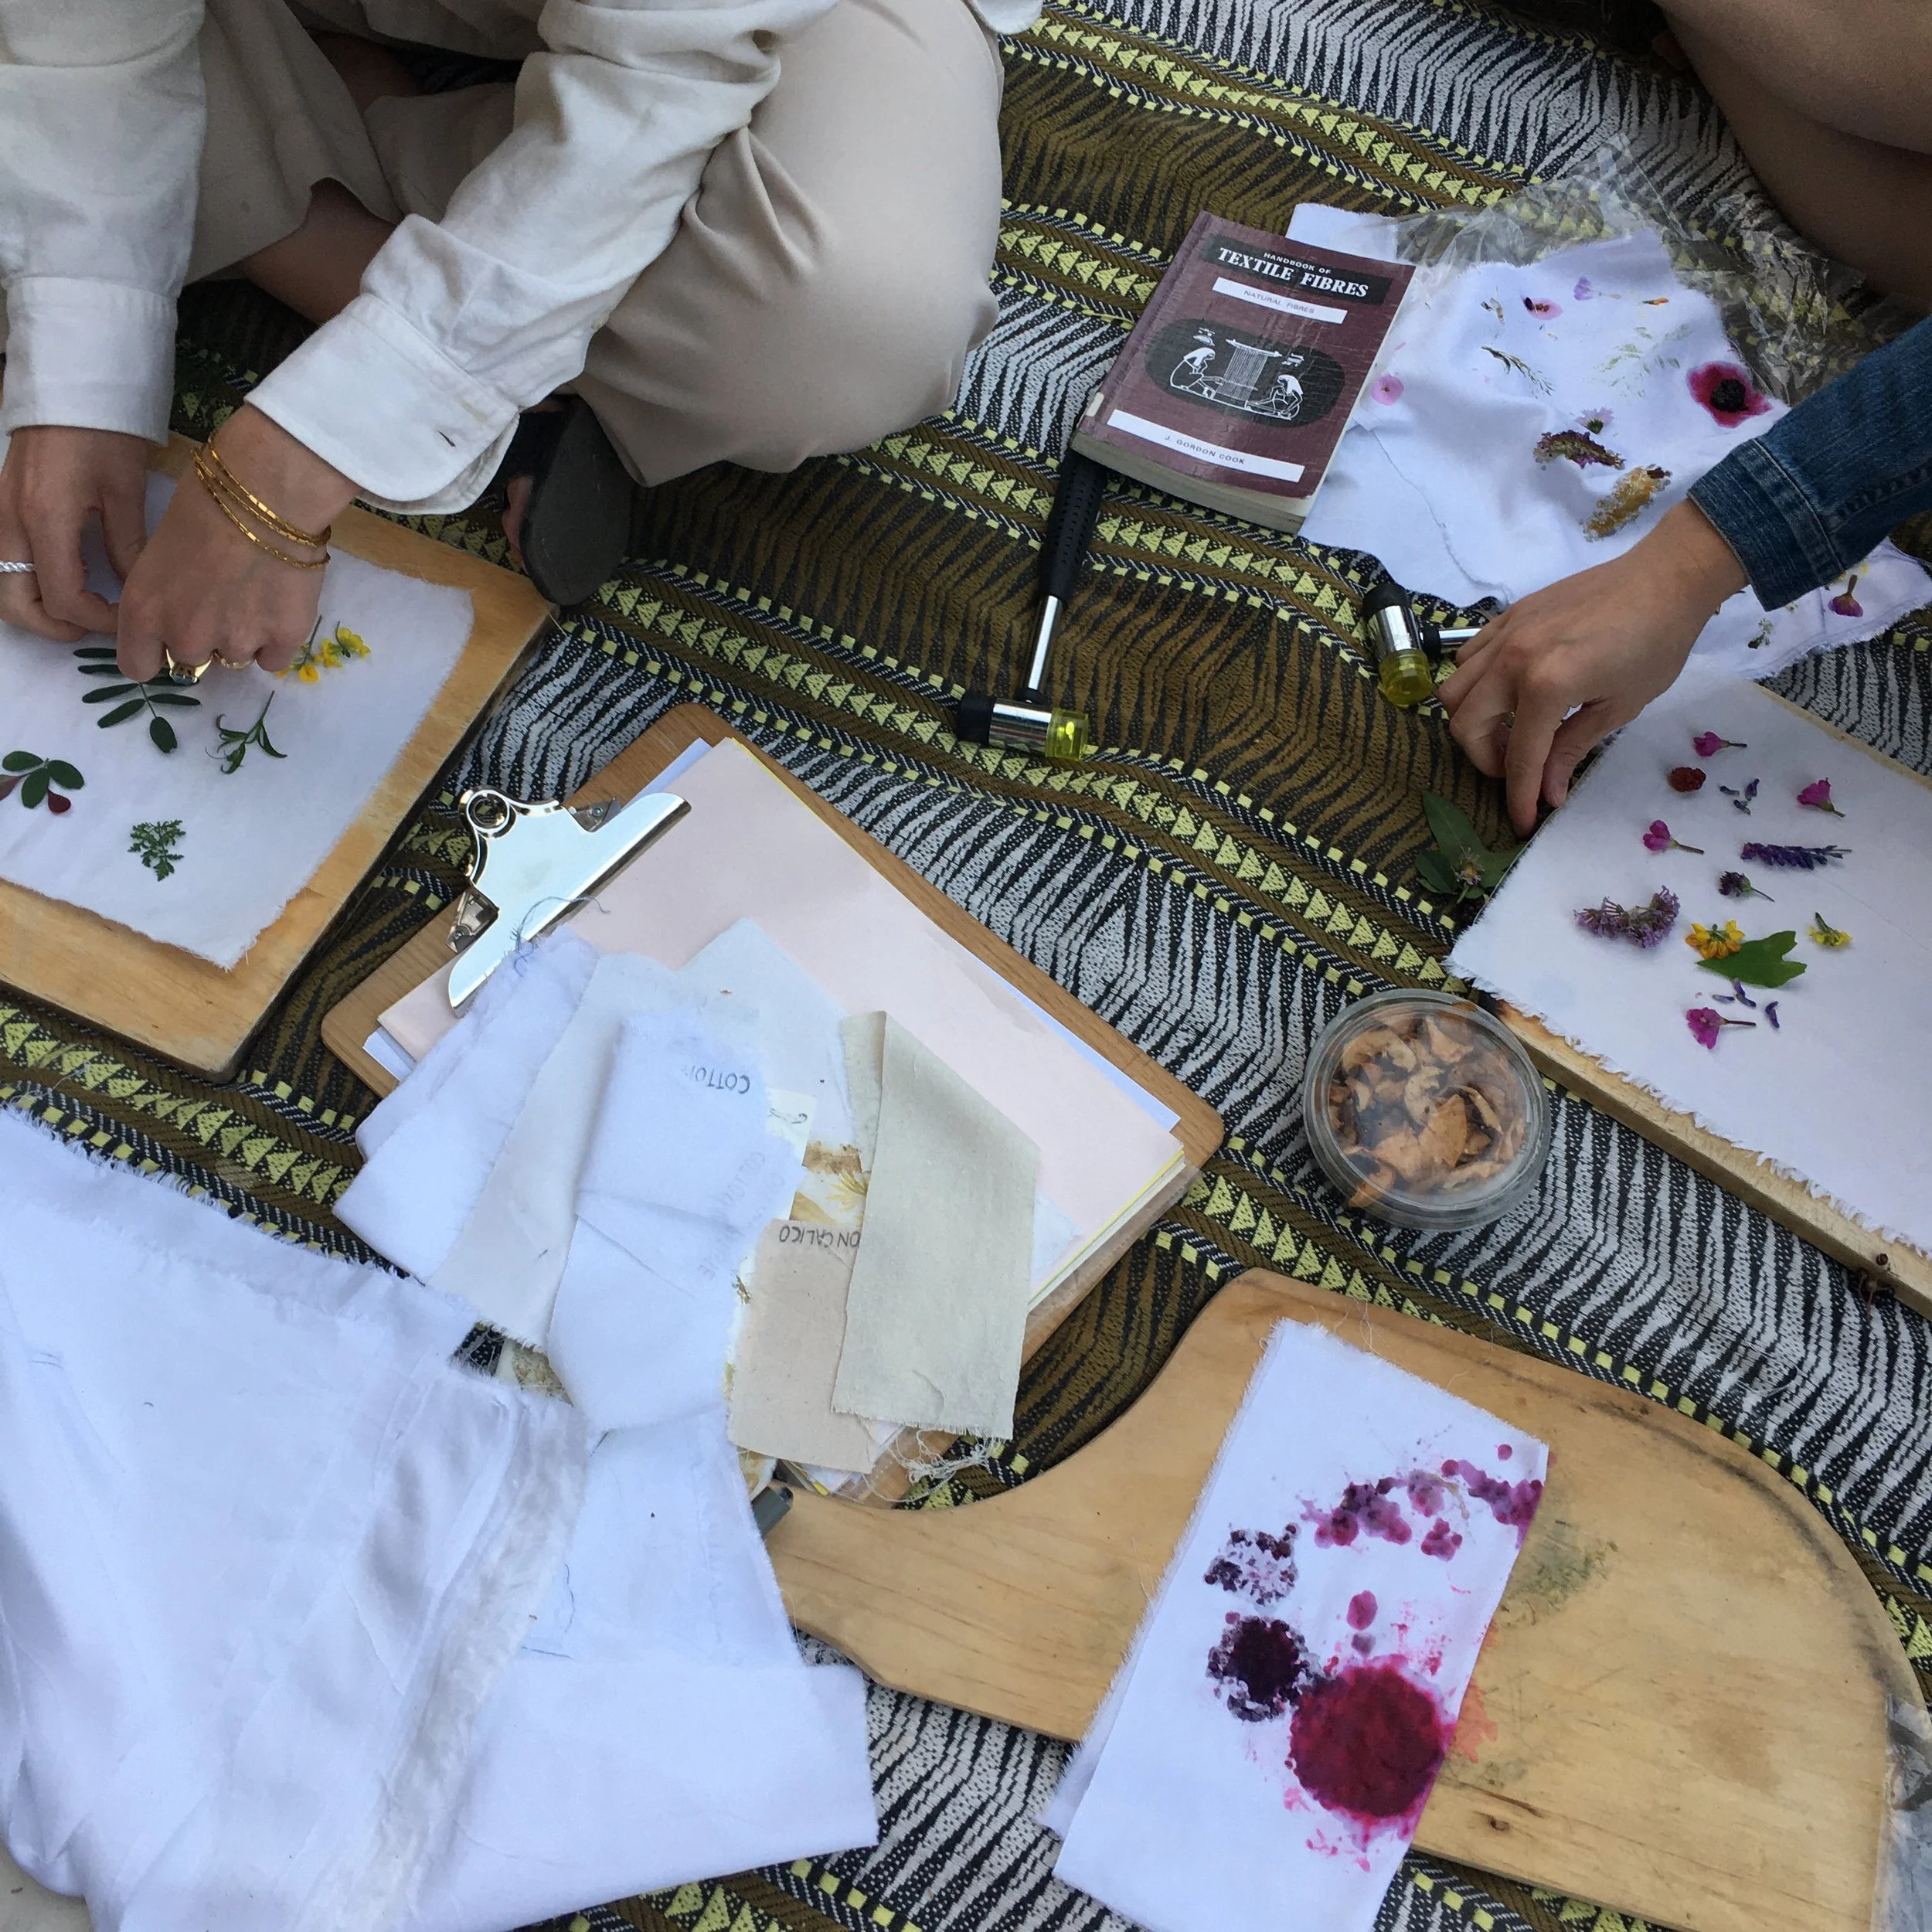
Images: A Fibre Festival at Abbey Gardens, London. Bed of healthy calendula, and a first attempt at plant pounding — ‘hapa zome’ with Cordwainers Natural Dye Studio.
How do you print with plants?
It’s useful to begin with recognising why plants have colour in the first place. Plant pigments are a biological necessity for organisms, just as with our own skin. Pigments — through their chemical compound — provide protection, attract particular pollinators, and help the organism absorb nutrients.
Most plants are green, which is the chlorophyll pigment key to photosynthesis. This process is essential for plant growth and health.
Accessory pigments are the ones that provide additional functions, such as pollinator attractiveness and as a warning signal. Carotenoids = yellow, orange and red plants/flowers. Anthocynanins = purple, pink and blue-hued plants/flowers. Betalains = red-violet plants/flowers and some higher fungi
Natural pigments are susceptible to changes, for instance thermal stress (carotenoids don’t like this) or oxidation (i.e. indigo).
As the plant grows, and as the flowers and fruit develops, the plant is changing its purpose essential for attracting pollinators and reproduction. So it’s important to know that as a plant part dies, the pigment goes with it (unless it’s somehow preserved through drying or freezing, or in oil/vinegar in the case of foods).
For this reason, fallen leaves will not give you the fresh pigment required to print with using the hapa zome technique, as the pigment is no longer functionally needed by the plant. But, plant matter can be dried or frozen for use in bundle dyeing or natural dyeing.
Hapa zome requires both fresh plant material and direct contact between the plant material and textiles or paper in order for the pigment to transfer.
How do you dye with plants?
Dyeing with plants is a different process. Though with bundle dyeing you do need that contact between plant material and textile, you are dispersing the pigment through steam (water vapour) and so you are essentially enlivening that pigment again. With natural dyeing, you are creating a diluted dye bath of plant material submersed in (usually) heated water. With these two techniques you are dyeing as opposed to printing — “printing” is more about the direct imprint than an overall colour.
And that’s what makes hapa zome so special and unique — you are imprinting your paper or textile with a direct pigment and shape, especially wonderful for leaves and flowers with veining or patterning.
What plants should you use to print with?
Foraging best practice.
First up, consider your foraging best practice.
⇾ 1. Take only as much as you need.
The primary rule for foraging is to only take as much as you need, and maybe even less than that.
Hapa zome is a gentle and mindful activity (even with the hammering that will come), and so you don’t need abundance like you do with dyeing. You will be scouting around primarily for fresh flowers, because these look pretty, but remember why the plants have flowers — for attracting pollinators, for warning off predators, and for reproduction. So be careful with how much you take, and recognise why you are taking it. Consider your purpose, your composition, your application.
⇾ 2. Know what it is you’re foraging.
Arguably, the primary rule of foraging is actually to know what it is you’re foraging, but to me, you first need to know what you’re going to do with the plant material before you can assess how much there is of it and subsequently how much of it you can take. So perhaps this is first or second on your foraging best practice list, but either way, be able to identify — at least in some manner — what it is you’re about to forage.
This is a rule whether you are foraging for food, for dyestuffs, for printing material, for weaving material… don’t go sticking your hands into and onto plants (even with gloves) unless you can ascertain that it is safe to do so. Look to the plant for clues; if it’s spiky then don’t go rushing in. If it’s a super tall hogweed with serrated leaves, don’t touch it. If it’s a parsley with a spotty red stem, don’t eat it.
⇾ 3. Be prepared with harvesting tools.
Carry some snips or sharp and clean secateurs, along with gloves, plastic or paper baggies, and a pen for labelling. I can’t go for a walk, run or cycle anymore without having my eyes peeled for plant material, especially in summer. Even if I’m not ready to harvest there and then, I’ll make a note of what I’ve seen and where, how abundant the plant is, how easy it is to access, and what I would use it for.
When you are harvesting, ensure clean sharp cuts (to reduce the risk of pathogens getting in to the wound) or use your fingernail to pop flowers off. You are essentially breaking off a plant’s limb, so go gently.
⇾ 4. Don’t go on private land without permission.
I do sometimes use the sneaky rule of foraging whatever is hanging over a fence from someone’s front garden (if it’s either abundant and/or dying back, and I only take what I can use). And generally in parks I’ll harvest the “wild” plants. However, I wouldn’t go into someone’s drive or garden, or go to the fenced off spaces in green spaces. I live in an urban environment so there is an abundance of wild and cultivated plants to choose from, but even in rural places there can be villages planted up nicely, and so realistically you simply need to consider rule number 1 again. At the moment I’m battling with some french marigolds that need dead-heading but I don’t know who owns and manages that tiny meanwhile planting space, and so to my utter dismay have left them.
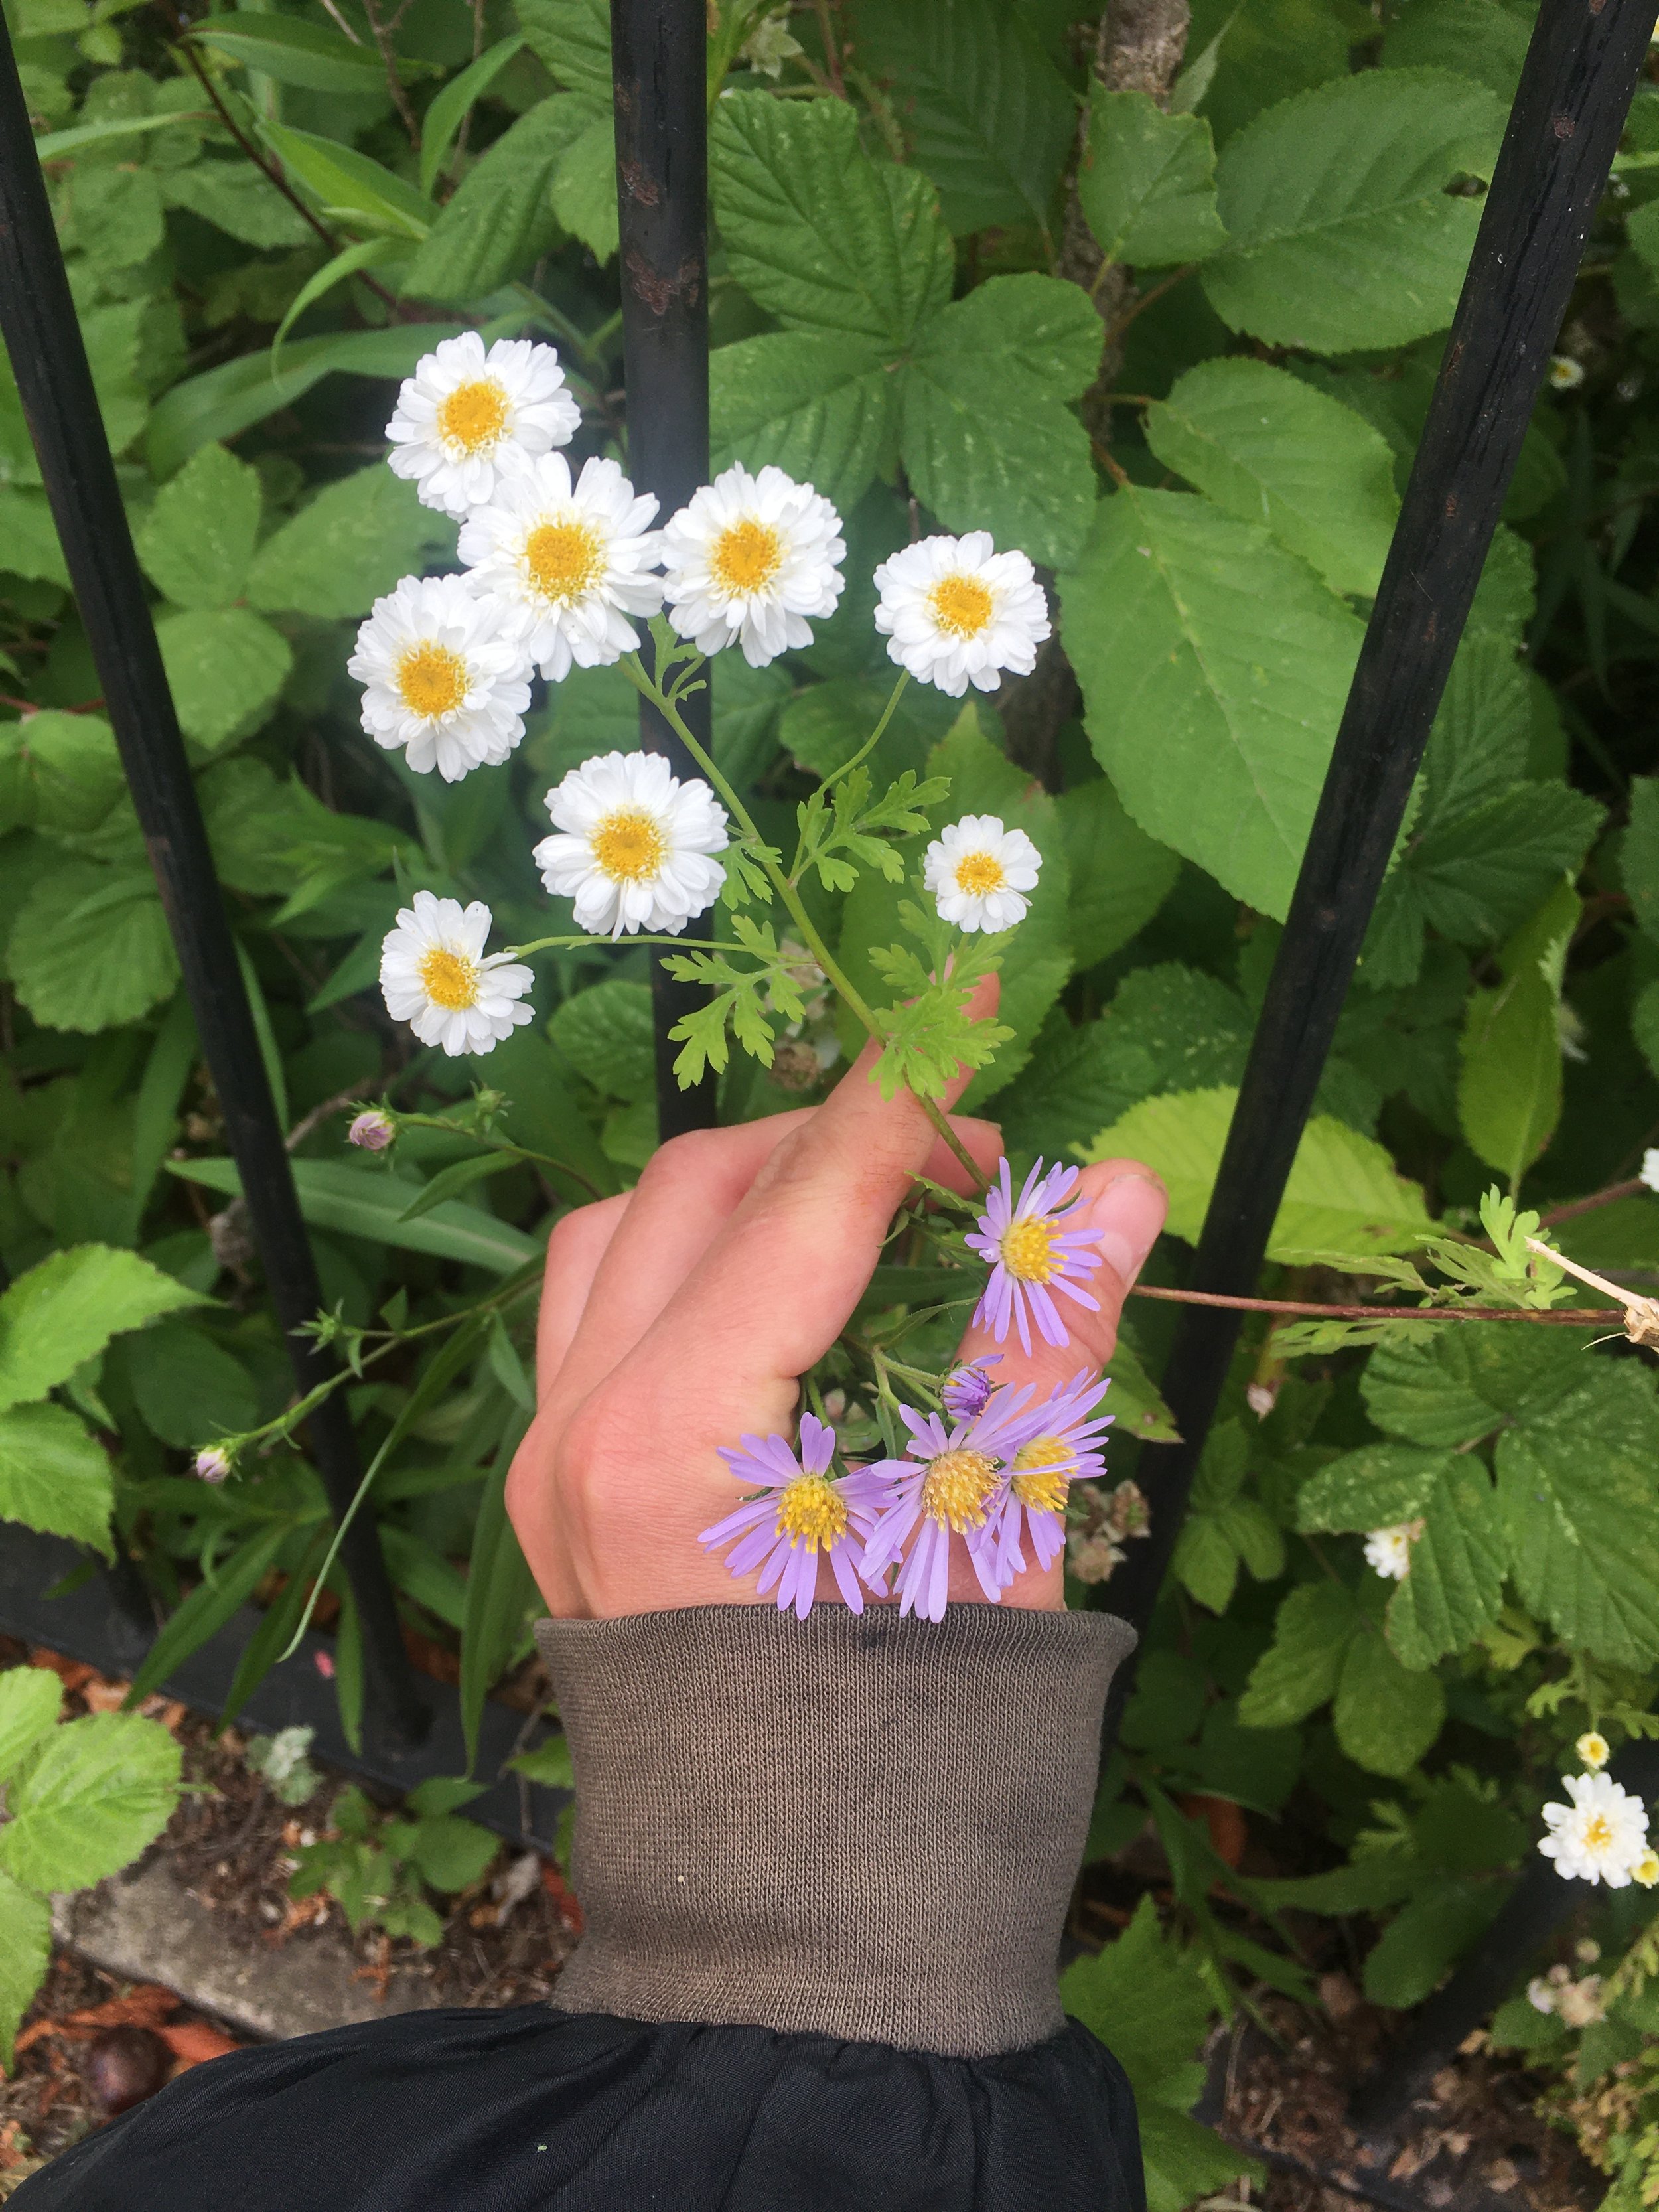


Images: Foraging some plant materials for printing. Feverfew and aster flowers from beside a local park’s pond; a semi-wild bouquet of chives, rocket, mustard, hyssop, nigella and an elderflower; plastic bags of foraged materials and bonsai snips; a workshop participant foraging from a wild hedge by a reservoir.
Hapa zome plant choice tips.
So when it comes to hapa zome, here are some tips:
☉ It’s not all about flowers. Leaves give interesting veining or outlines.
☉ Harvest fresh from the plant; once the material has fallen, the pigment dies too.
☉ Waxy plants and anything too fluffy tend not to print well. The waxy plants are coated and that pigment is locked in (think of the purpose of evergreen).
☉ Watery plants tend not to print well. Things like succulents and lettuce that are mostly water won’t really transfer pigment. But you also find watery-ness after a rainy day, so some petals also won’t transfer pigment.
☉ Don’t harvest on a wet day for this reason.
☉ Consider your composition before you harvest; what colours are you likely to get? Sure hapa zome can be about experimenting and connecting in the moment, but if you can surmise the outcome, this will help to be efficient and careful with your choices.
☉ That being said, you can expect a certain colour from a petal or leaf only to print something different; remember, we see colour differently to other organisms and so that pigment may not be truthful.
☉ Use it as playtime, but record what works and what doesn’t; what season; what the weather was doing when you harvested; what textile or paper you’re using.


Images: examples of plant material for hapa zome printing — various leaves of weeds, trees and edibles; cosmos flowers; wildflowers including vetch and willowherb; and herbal flowers including mallow and calendula.
Hapa zome workshops in London.
⁕
Hapa zome workshops in London. ⁕
How do you print with your foraged plant materials?
Technique.
The technique for printing with your plant material is straightfoward. I tend to describe it as “giving it a bash”, in terms of experimentation and in terms of method.
⇾ You place your plant material onto textiles or paper, cover it with another layer of textiles or paper, and hammer on the top of the three bits.
⇾ It does take patience and care.
⇾ You don’t need to hammer heavy or hard or fast, but instead appreciate that if there is pigment, it’ll be released in its own time. You can even use the edge of a hammer or a rock for different textures. Consider the texture of your surface too.
⇾ You can compose your piece however you like — you can chuck all the plant bits on and hammer away, or place one leaf/flower, hammer print, see how it is, continue composing.


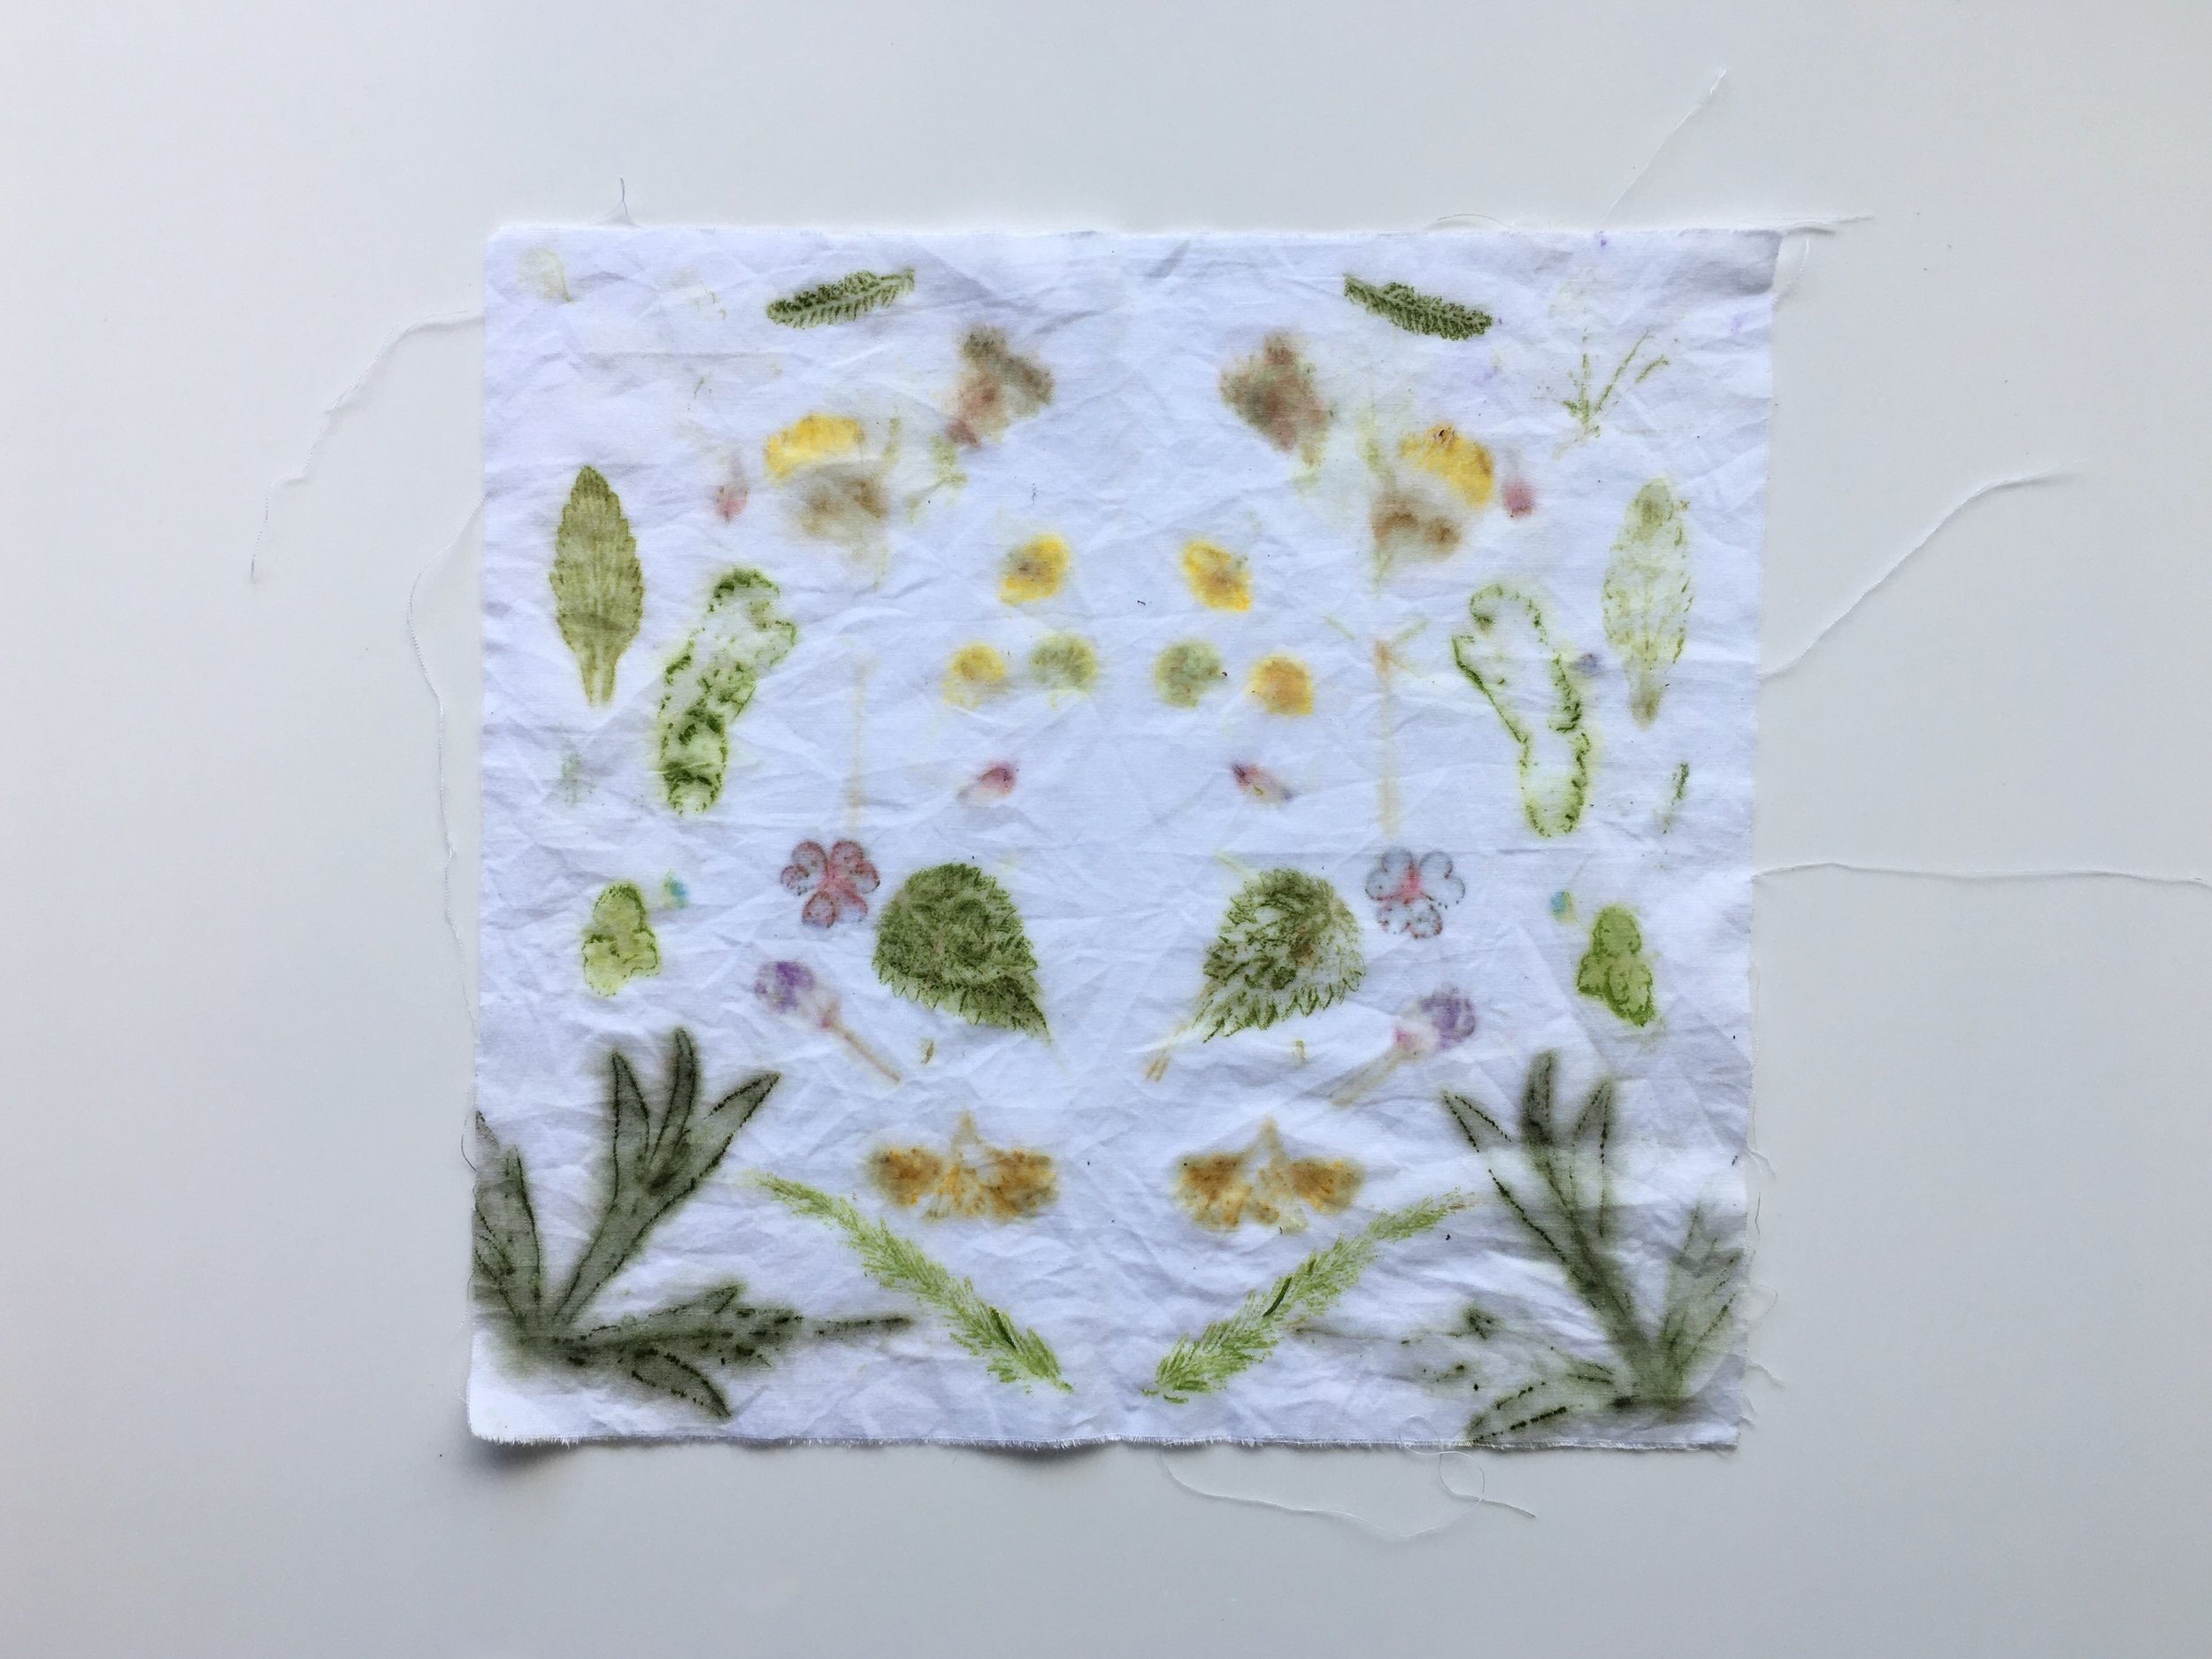

Images: examples of techniques to employ when hapa zome printing — the singular approach can also be done gently composed or experimentally chaotic as seen by this calico piece thoughtfully printed over a berry-splattered t-shirt; a selection of singular plant prints on cotton poplin; a symmetrical plant print on wet cotton poplin (so the prints have bled); and using the edge of the hammer to print the plant with a brushstroke effect.
Methods.
Go for the symmetrical approach with one print (what I call Rorshach) and place your plant material on one side of the textile or paper, fold it over and hammer. Open up to reveal a symmetrical piece (you may uncover differences in the patterning, colour or veining on one side to the other).
Go for the singular approach, but with two separate prints. Place your plant material wherever you like on your textile or material (could be sporadic or a mandala effect), take a separate piece of fabric or paper and place over the top of the plant, then hammer. You’ll then have two separate prints to use as you like.


Images: examples of approaches to hapa zome printing — having patience to reveal the veining of leaves; composing very gently and elegantly; bashing berries; and putting everything in and seeing what happens.
What materials do you use for plant printing?
The way the plant pigments interact with fibre molecules is a symbiosis. The outcome of the print will be determined by the fibre type, fabric type and what finishing processes it has gone through.
It is similar for your paper choices; anything coated, or rough, or dark, won’t show the print as well as something uncoated, smooth and light.
If you can, experiment with different fibre and fabrics, or papers and card. Learn for yourself what works best for certain plant materials. But here are some personal learnings:
White fabrics allow the colours to pop
Pre-wetting the fabric doesn’t necessarily help fixing, and will make some pigments bleed out
Unbleached fabrics give you a raw look
Silk, or other sateen weaves, provide a smooth surface for clean prints but can move when you are hammering
Fuzzy materials make a fuzzy print, so this includes knitted items or ribbed socks
Stretchy fabrics will move when you’re hammering, so go slow, or embrace the blurred print
Linen tends to offer duller shades regardless of the printing or dyeing type
Cotton has the most options in terms of weave and finish
Coated materials i.e. mercerised, may only temporarily receive a print
The paper you use (colour, texture, weight) will take up pigments differently too e.g. smoother = less transfer


Can you print on existing clothing?
Hapa zome is a lovely way to update an existing garment or accessory. Even if you don’t want to go through the hassle and expense of mordanting your textiles, you can still temporarily print your pieces — which is especially useful for items like socks or children’s clothes that frequently get washed, and so you can experiment with this activity multiple times without buying new.
Hapa zome is also a cute way to jazz up some basic fabric or paper for gift wrap, labels and bunting.
Some tips for printing onto clothing:
Wash your item first to get rid of any oils, grease or sweat that can hamper the efficacy of a print
Consider how you normally wear that item, and if there are any marks or areas you want to hide or exaggerate
Printing on the full length of socks is fun, but unless you’re wearing sandals and the design will be fully seen, your sweat will degrade the dyes on the foot, so maybe don’t put energy here
Remember all those cotton tote bags you’ve received over the years? Print them!


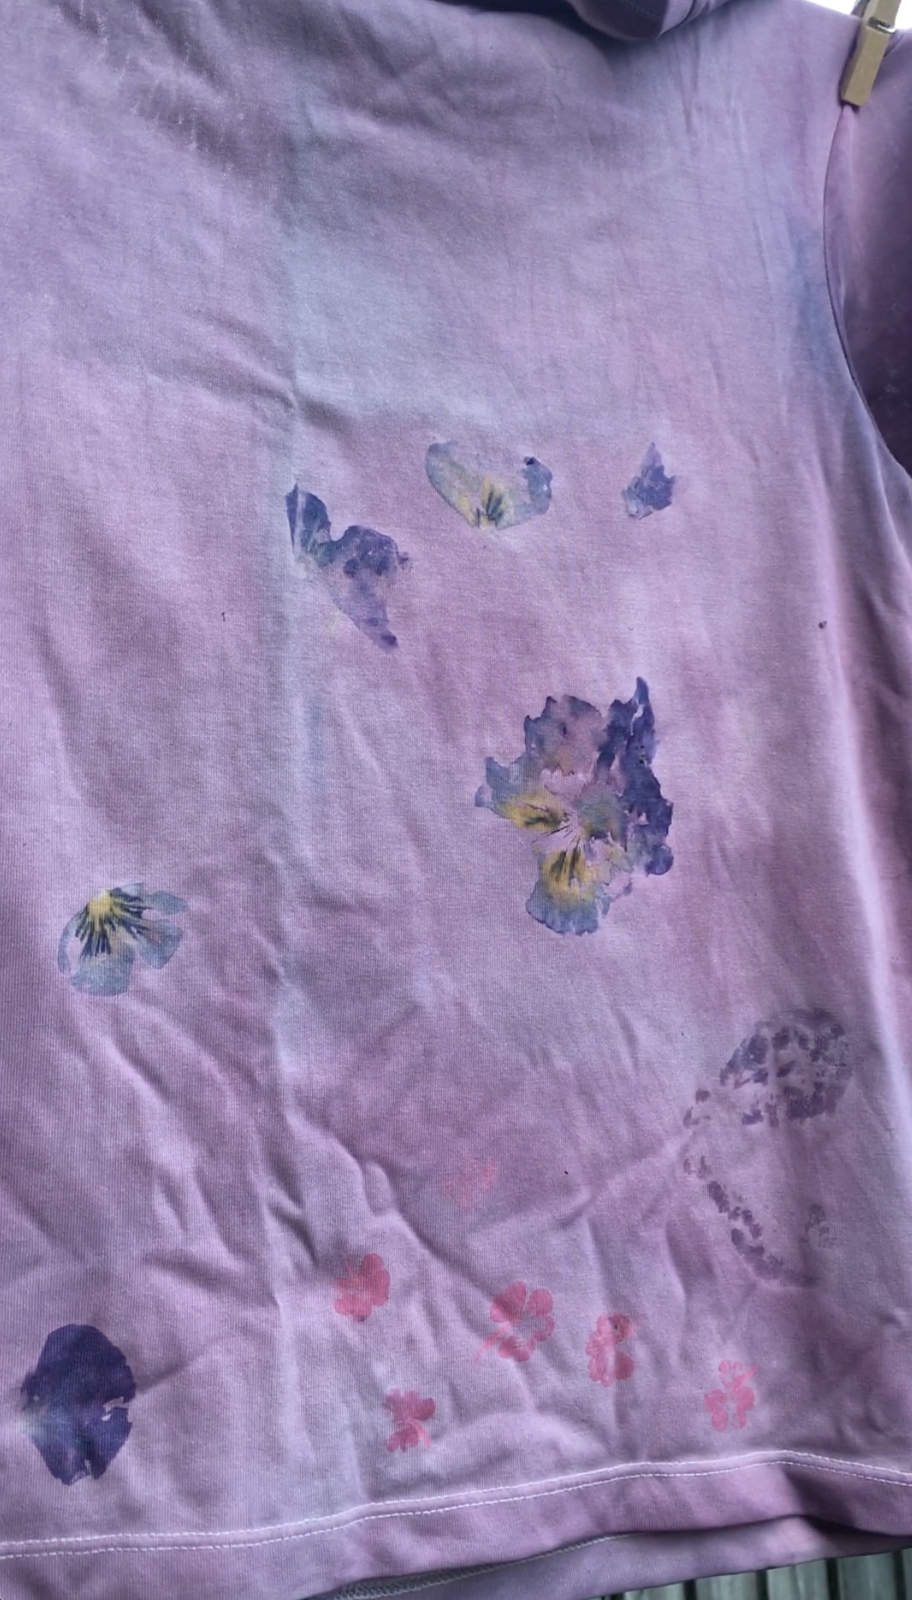

Images: examples of hapa zome printing onto clothing — a pair of white cotton Uniqlo socks printed with flowers; an old stained white jersey t-shirt hammered with mahonia berries; a blackberry-dyed Tencel jersey t-shirt printed with pansies and wood sorrel; a pair of vintage pink cotton shorts printed with cosmos flowers.
How do you care for your hapa zome artwork?
Mordanting.
What should have been mentioned earlier is that there are some considerations to make with your printed piece and its application. However, this control can sometimes make the practice inaccessible in terms of cost, regarding time, space and equipment.
Fabric dye fixatives (otherwise known as mordants) are generally bought in, are mined or synthetic minerals (even when choosing the less toxic options), require you to have separate pans/tools, need airflow and drying space, and cost you for gas/electricity and water.
If you’re printing for fun, or with kids:
Don’t overly concern yourself with the mordanting. Though it will help the pigment fix better to the fabric, it’s probably more about the process than the finished product. You can’t mordant paper anyway.
If you’re printing for a finished outcome:
You could mordant beforehand, but do consider what the printer will use their finished product for. Sometimes ephemerality is good; you can use the same piece of fabric to print with later if the colours have faded. If they want to keep it as a functional garment or an artwork, then mordanting will extend the colour lifespan, but do recognise that natural colours will always fade over time and with washing regardless.
Washing.
Once you have printed your textile, you can peel away the soggy plant material (or leave it to dry first then peel away later).
Rinse in cold or luke warm water — this helps preserve the pigment, like you would for any naturally-dyed textile or delicate fabric.
You can let it dry, but out of direct sunlight is best, as this breaks down the pigments.
Heat set with an iron if you like (some people suggest this) just simply by setting your iron to the temperature for your fabric fibre, and ironing with a little steam.
If you have printed a garment, then unfortunately the print will fade with washing and use, especially if it will come into contact with sweat. Choosing a pH neutral soup will ensure than enzymes in common detergents don’t break down the pigments.


Images: hammer printing onto a long narrow piece of mordanted organic bamboo silk and the finished horizontal print, now suitable as a scarf; a cleanly composed and crisply printed organic cotton poplin; prints from a community garden session on organic cotton calico.