Nature Connection: Bundle Dyeing.
The magical art of “bundle dyeing” — plant printing, botanical printing, eco printing — is a simple and exciting activity to try, that can also be seasonal, local or use food waste. For adults and children alike, it’s a space for experimentation and play.
This blog introduces you to a personal approach to this botanical printing activity of bundle dyeing.
What is bundle dyeing?
Bundle dyeing is the art of printing a textile using natural colour through the process of steaming. The naturally-occurring pigments in the plant matter dye the textiles, but because you are directly using the plant materials on the cloth rather than making a dye bath or vat, the pigment leaves a pattern.
Conversely, with natural dyeing you’re dispersing the pigment across the textile so (usually) achieving a solid colour. So bundle dyeing can often give you a more vibrant colour than a dye vat as the pigments haven’t been diluted in water.
You’ll also achieve patterning through the way you roll or fold up the textile, along with whether you wrap it with rubber bands or yarn. (Using aluminium foil or cling film rather than a binding could prevent the tie-dye effect lines from occurring).
You’ll never be fully able to control what happens on the cloth. It is dependent on:
the freshness or efficient drying of the plant material you’re using
the fixative applied to your fibre (or natural tannins in your plant material)
the fibre and fabric weave itself
the pH of your water source
the temperature applied
the length of steaming and,
how it’s bundled up.
For this reason, bundle dyeing is total playtime.


Images: 1. An outdoor workshop showing attendees wearing latex-free gloves; 2. Stainless steel steamer pans filled with bundles, each with their own ID ribbon; 3. Messy tablecloth from berry juice strewn with snips, elastic bands and yarn; 4. Food waste bundles hung on a washing line in a garden.
How do you print with plants?
It’s useful to begin with recognising why plants have colour in the first place. Plant pigments are a biological necessity for organisms, just as with our own skin. Pigments — through their chemical compound — provide protection, attract particular pollinators, and help the organism absorb nutrients.
Most plants are green, which is the chlorophyll pigment key to photosynthesis. This process is essential for plant growth and health.
Accessory pigments are the ones that provide additional functions, such as pollinator attractiveness and as a warning signal. Carotenoids = yellow, orange and red plants/flowers. Anthocynanins = purple, pink and blue-hued plants/flowers. Betalains = red-violet plants/flowers and some higher fungi
Natural pigments are susceptible to changes, for instance thermal stress (carotenoids don’t like this) or oxidation (i.e. indigo).
As the plant grows, and as the flowers and fruit develops, the plant is changing its purpose essential for attracting pollinators and reproduction. So it’s important to know that as a plant part dies, the pigment goes with it (unless it’s somehow preserved through drying or freezing, or in oil/vinegar in the case of foods).
Where bundle dyeing or natural dyeing differs to plant pounding (hapa zome) is in how you are extracting the pigment. Hapa zome requires both fresh plant material and direct contact between the plant material and textiles or paper in order for the pigment to transfer, whereas bundle dyeing uses steam to release pigment in a very specific place. If the pigment has already gone (i.e. hasn’t been preserved before the plant material has started dying), or was very weak to begin with, then bundle dyeing with that plant matter can still be as experimental as hapa zome.


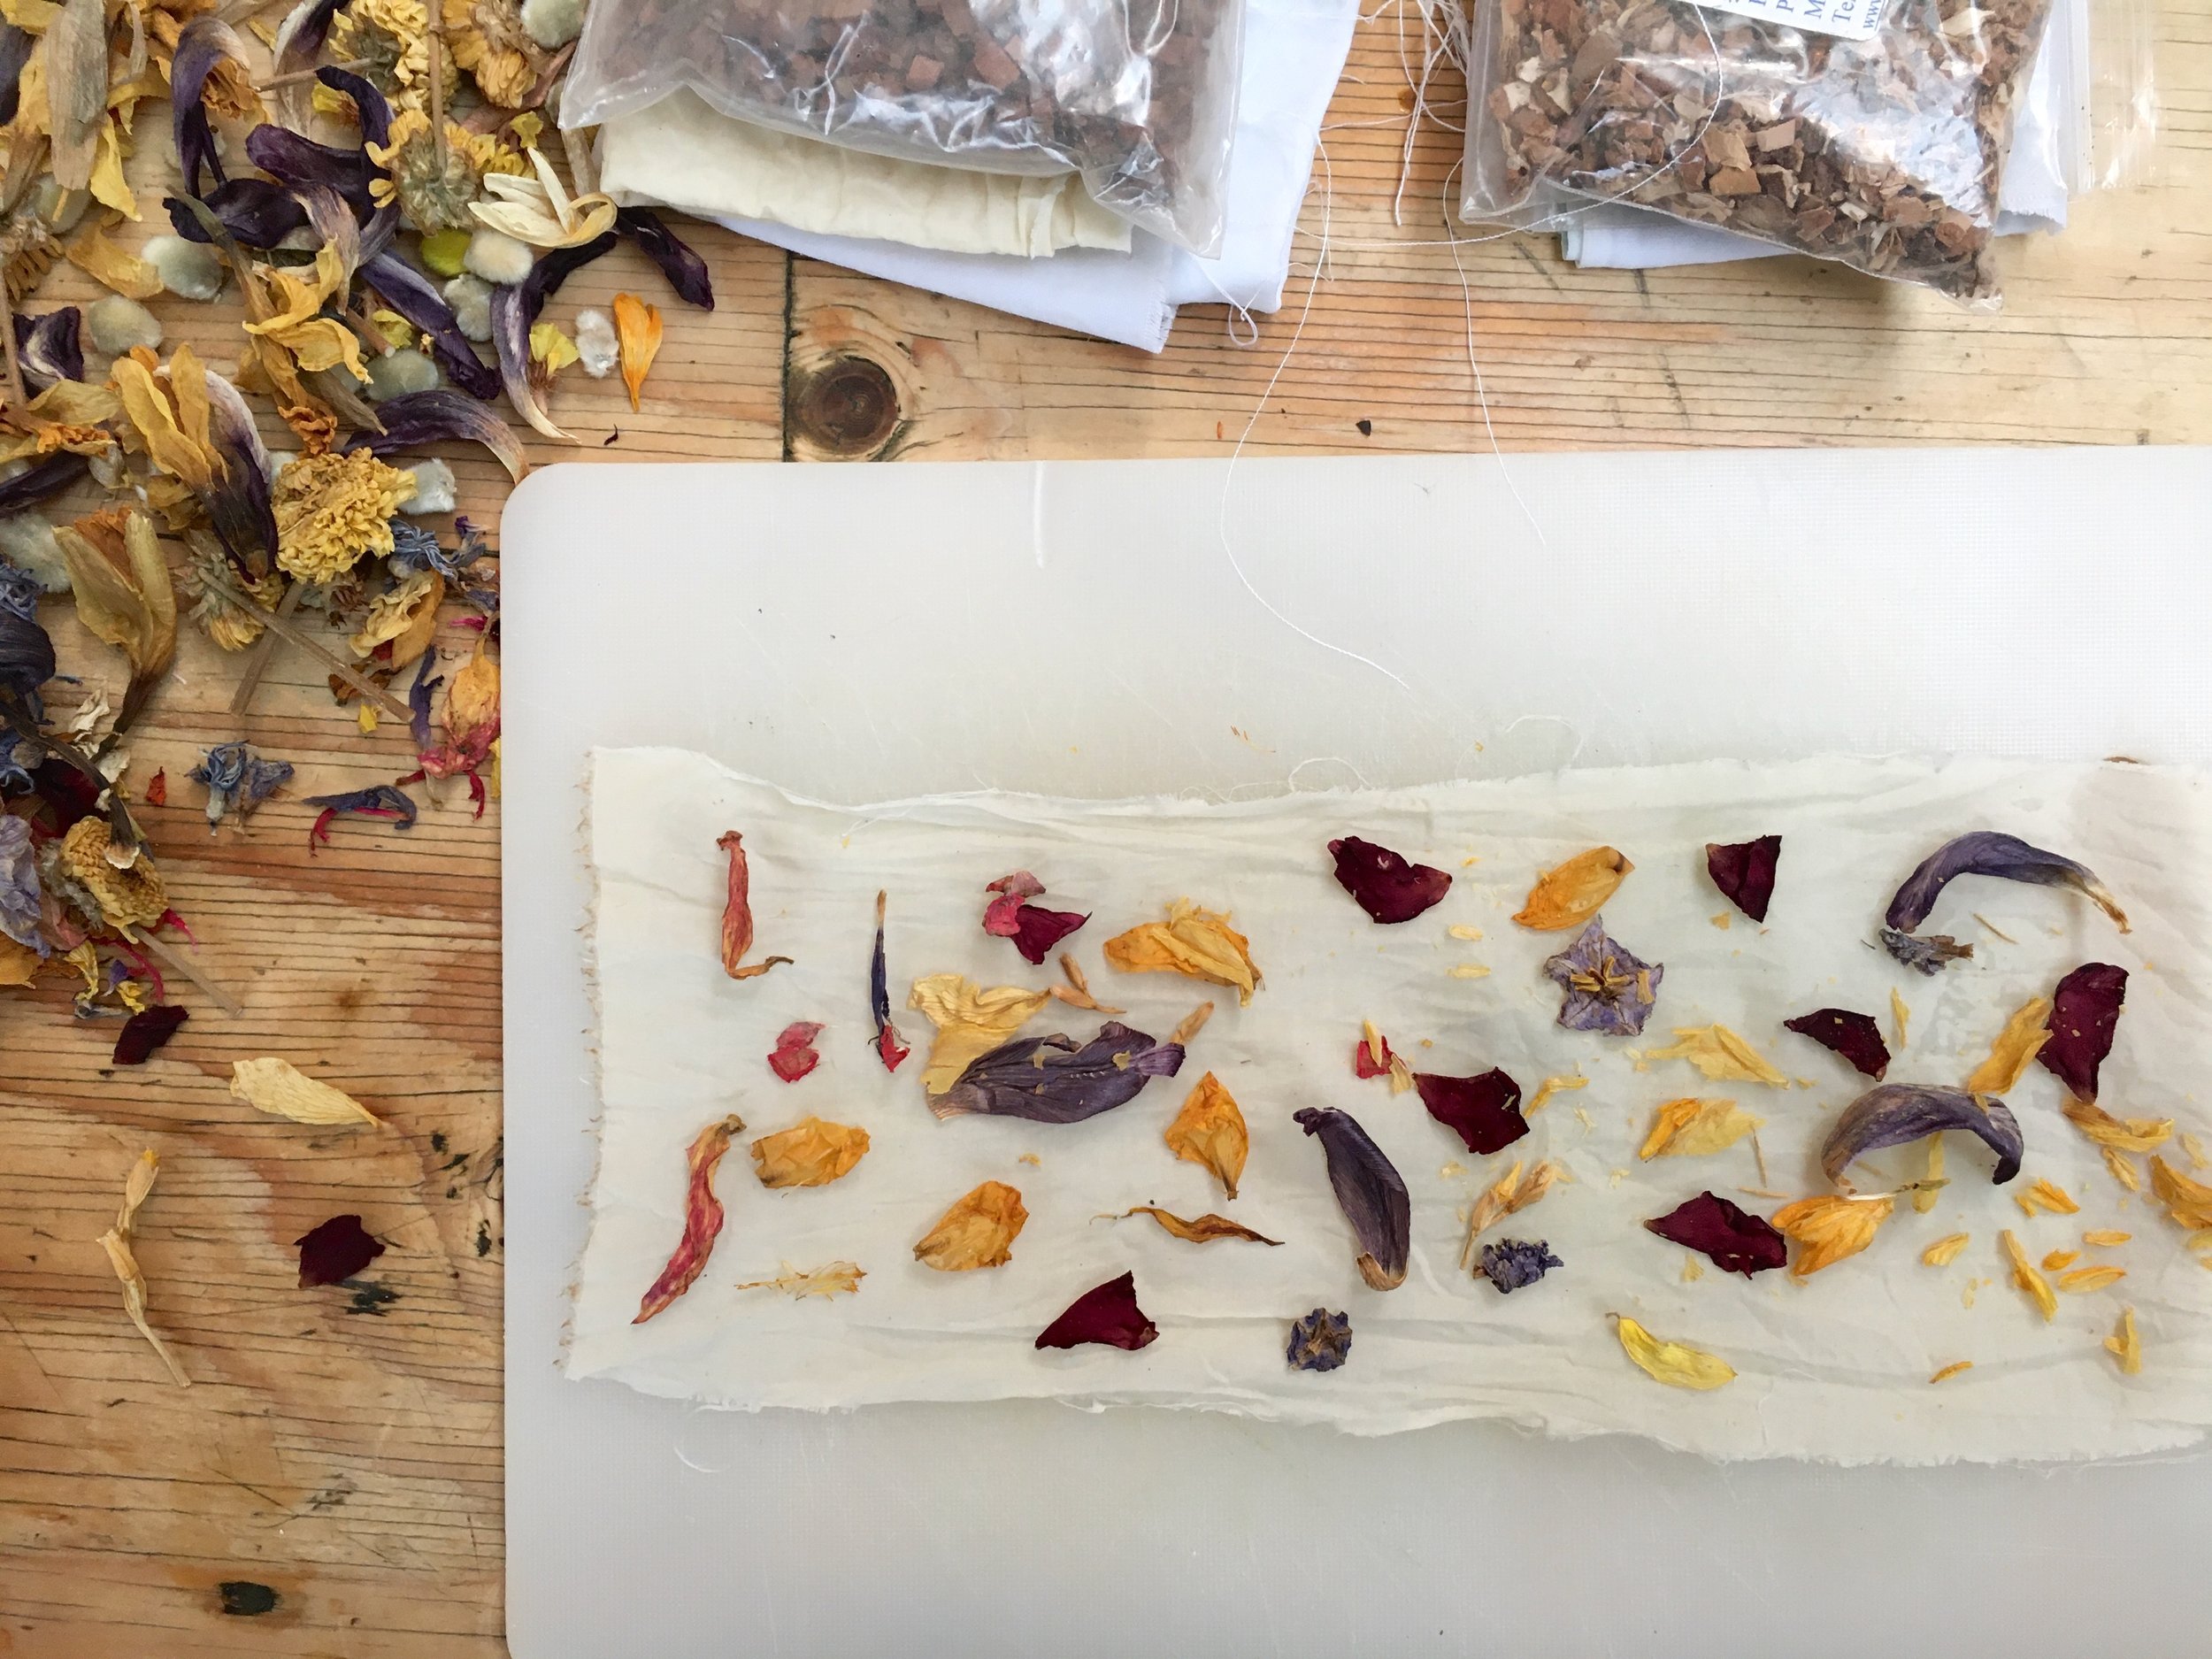
Images: 1. Foraging hollyhock petal buds that have dropped to the ground; 2. Selection of dried plant matter ready for a bundle dyeing workshop; 3. A workshop participant’s fabric composed with plant materials; 4. Exhausted plant matter that can now be composted.
How do you dye with plants?
Dyeing with plants is a different process. Though with bundle dyeing you do need that contact between plant material and textile, you are dispersing the pigment through steam (water vapour) and so you are essentially enlivening that pigment again. With natural dyeing, you are creating a diluted dye bath of plant material submersed in (usually) heated water, with the colour expanding (usually) consistently throughout the fabric. With these two techniques you are dyeing as opposed to printing — “printing” is more about the direct imprint than an overall colour.
And that’s what makes both bundle dyeing so special and unique — you are imprinting your textile with a direct yet dispersed pigment.
What plants should you use to print with?
Foraging best practice.
First up, consider your foraging best practice.
⇾ 1. Take only as much as you need.
The primary rule for foraging is to only take as much as you need, and maybe even less than that.
Bundle dyeing is a gentle and mindful activity that gives you great results with minimal materials, and so you don’t need abundance like you do with dyeing using a dye bath. You will be scouting around primarily for fresh flowers, because these look pretty and give you the vibrant range of shades, but remember why the plants have flowers — for attracting pollinators, for warning off predators, and for reproduction. So be careful with how much you take, and recognise why you are taking it. Consider your purpose, your composition, your application.
⇾ 2. Know what it is you’re foraging.
Arguably, the primary rule of foraging is actually to know what it is you’re foraging, but to me, you first need to know what you’re going to do with the plant material before you can assess how much there is of it and subsequently how much of it you can take. So perhaps this is first or second on your foraging best practice list, but either way, be able to identify — at least in some manner — what it is you’re about to forage.
This is a rule whether you are foraging for food, for dyestuffs, for printing material, for weaving material… don’t go sticking your hands into and onto plants (even with gloves) unless you can ascertain that it is safe to do so. Look to the plant for clues; if it’s spiky then don’t go rushing in. If it’s a super tall hogweed with serrated leaves, don’t touch it (this is Giant Hogweed). If it’s a parsley with a spotty red stem, don’t eat it (this is Hemlock).
⇾ 3. Be prepared with harvesting tools.
Carry some snips or sharp and clean secateurs, along with gloves, plastic or paper baggies, and a pen for labelling. I can’t go for a walk, run or cycle anymore without having my eyes peeled for plant material, especially in summer. Even if I’m not ready to harvest there and then, I’ll make a note of what I’ve seen and where, how abundant the plant is, how easy it is to access, and what I would use it for.
When you are harvesting, ensure clean sharp cuts (to reduce the risk of pathogens getting in to the wound) or use your fingernail to pop flowers off. You are essentially breaking off a plant’s limb, so go gently.
⇾ 4. Don’t go on private land without permission.
I do sometimes use the sneaky rule of foraging whatever is hanging over a fence from someone’s front garden (if it’s either abundant and/or dying back, and I only take what I can use). And generally in parks I’ll harvest the “wild” plants. However, I wouldn’t go into someone’s drive or garden, or go to the fenced off spaces in green spaces. I live in an urban environment so there is an abundance of wild and cultivated plants to choose from, but even in rural places there can be villages planted up nicely, and so realistically you simply need to consider rule number 1 again. At the moment I’m battling with some french marigolds that need dead-heading but I don’t know who owns and manages that tiny meanwhile planting space, and so to my utter dismay have left them.
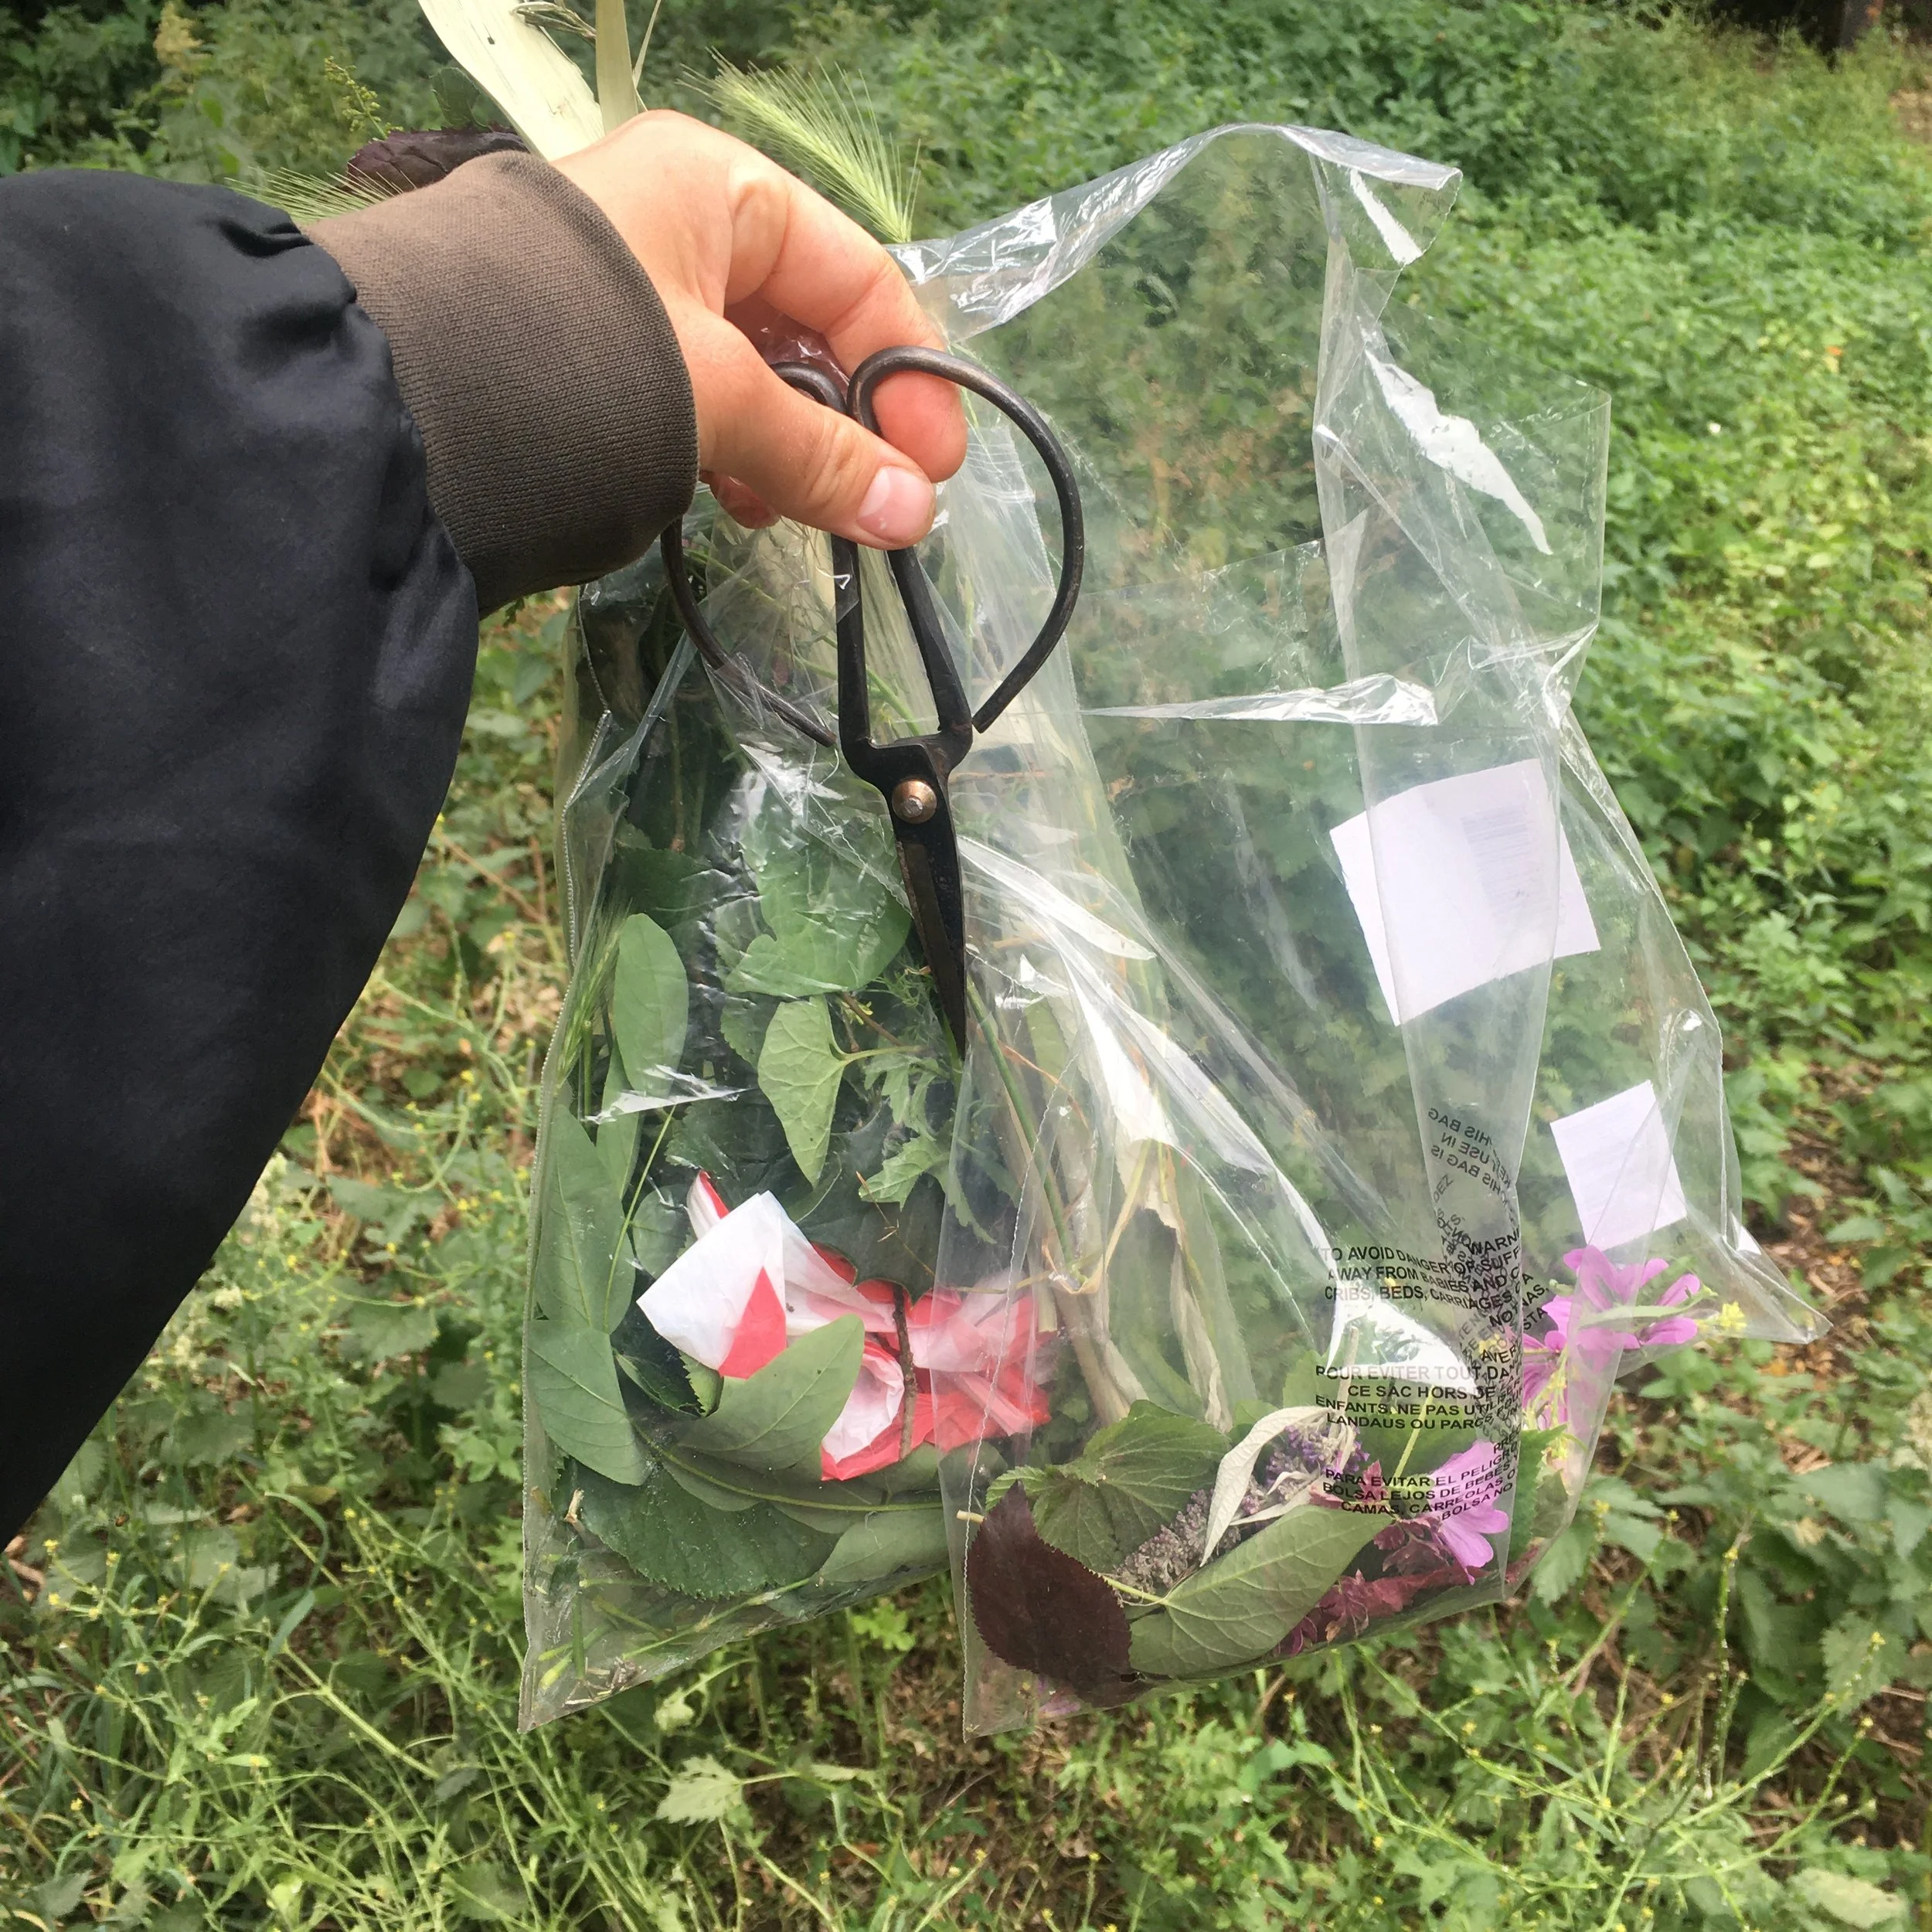


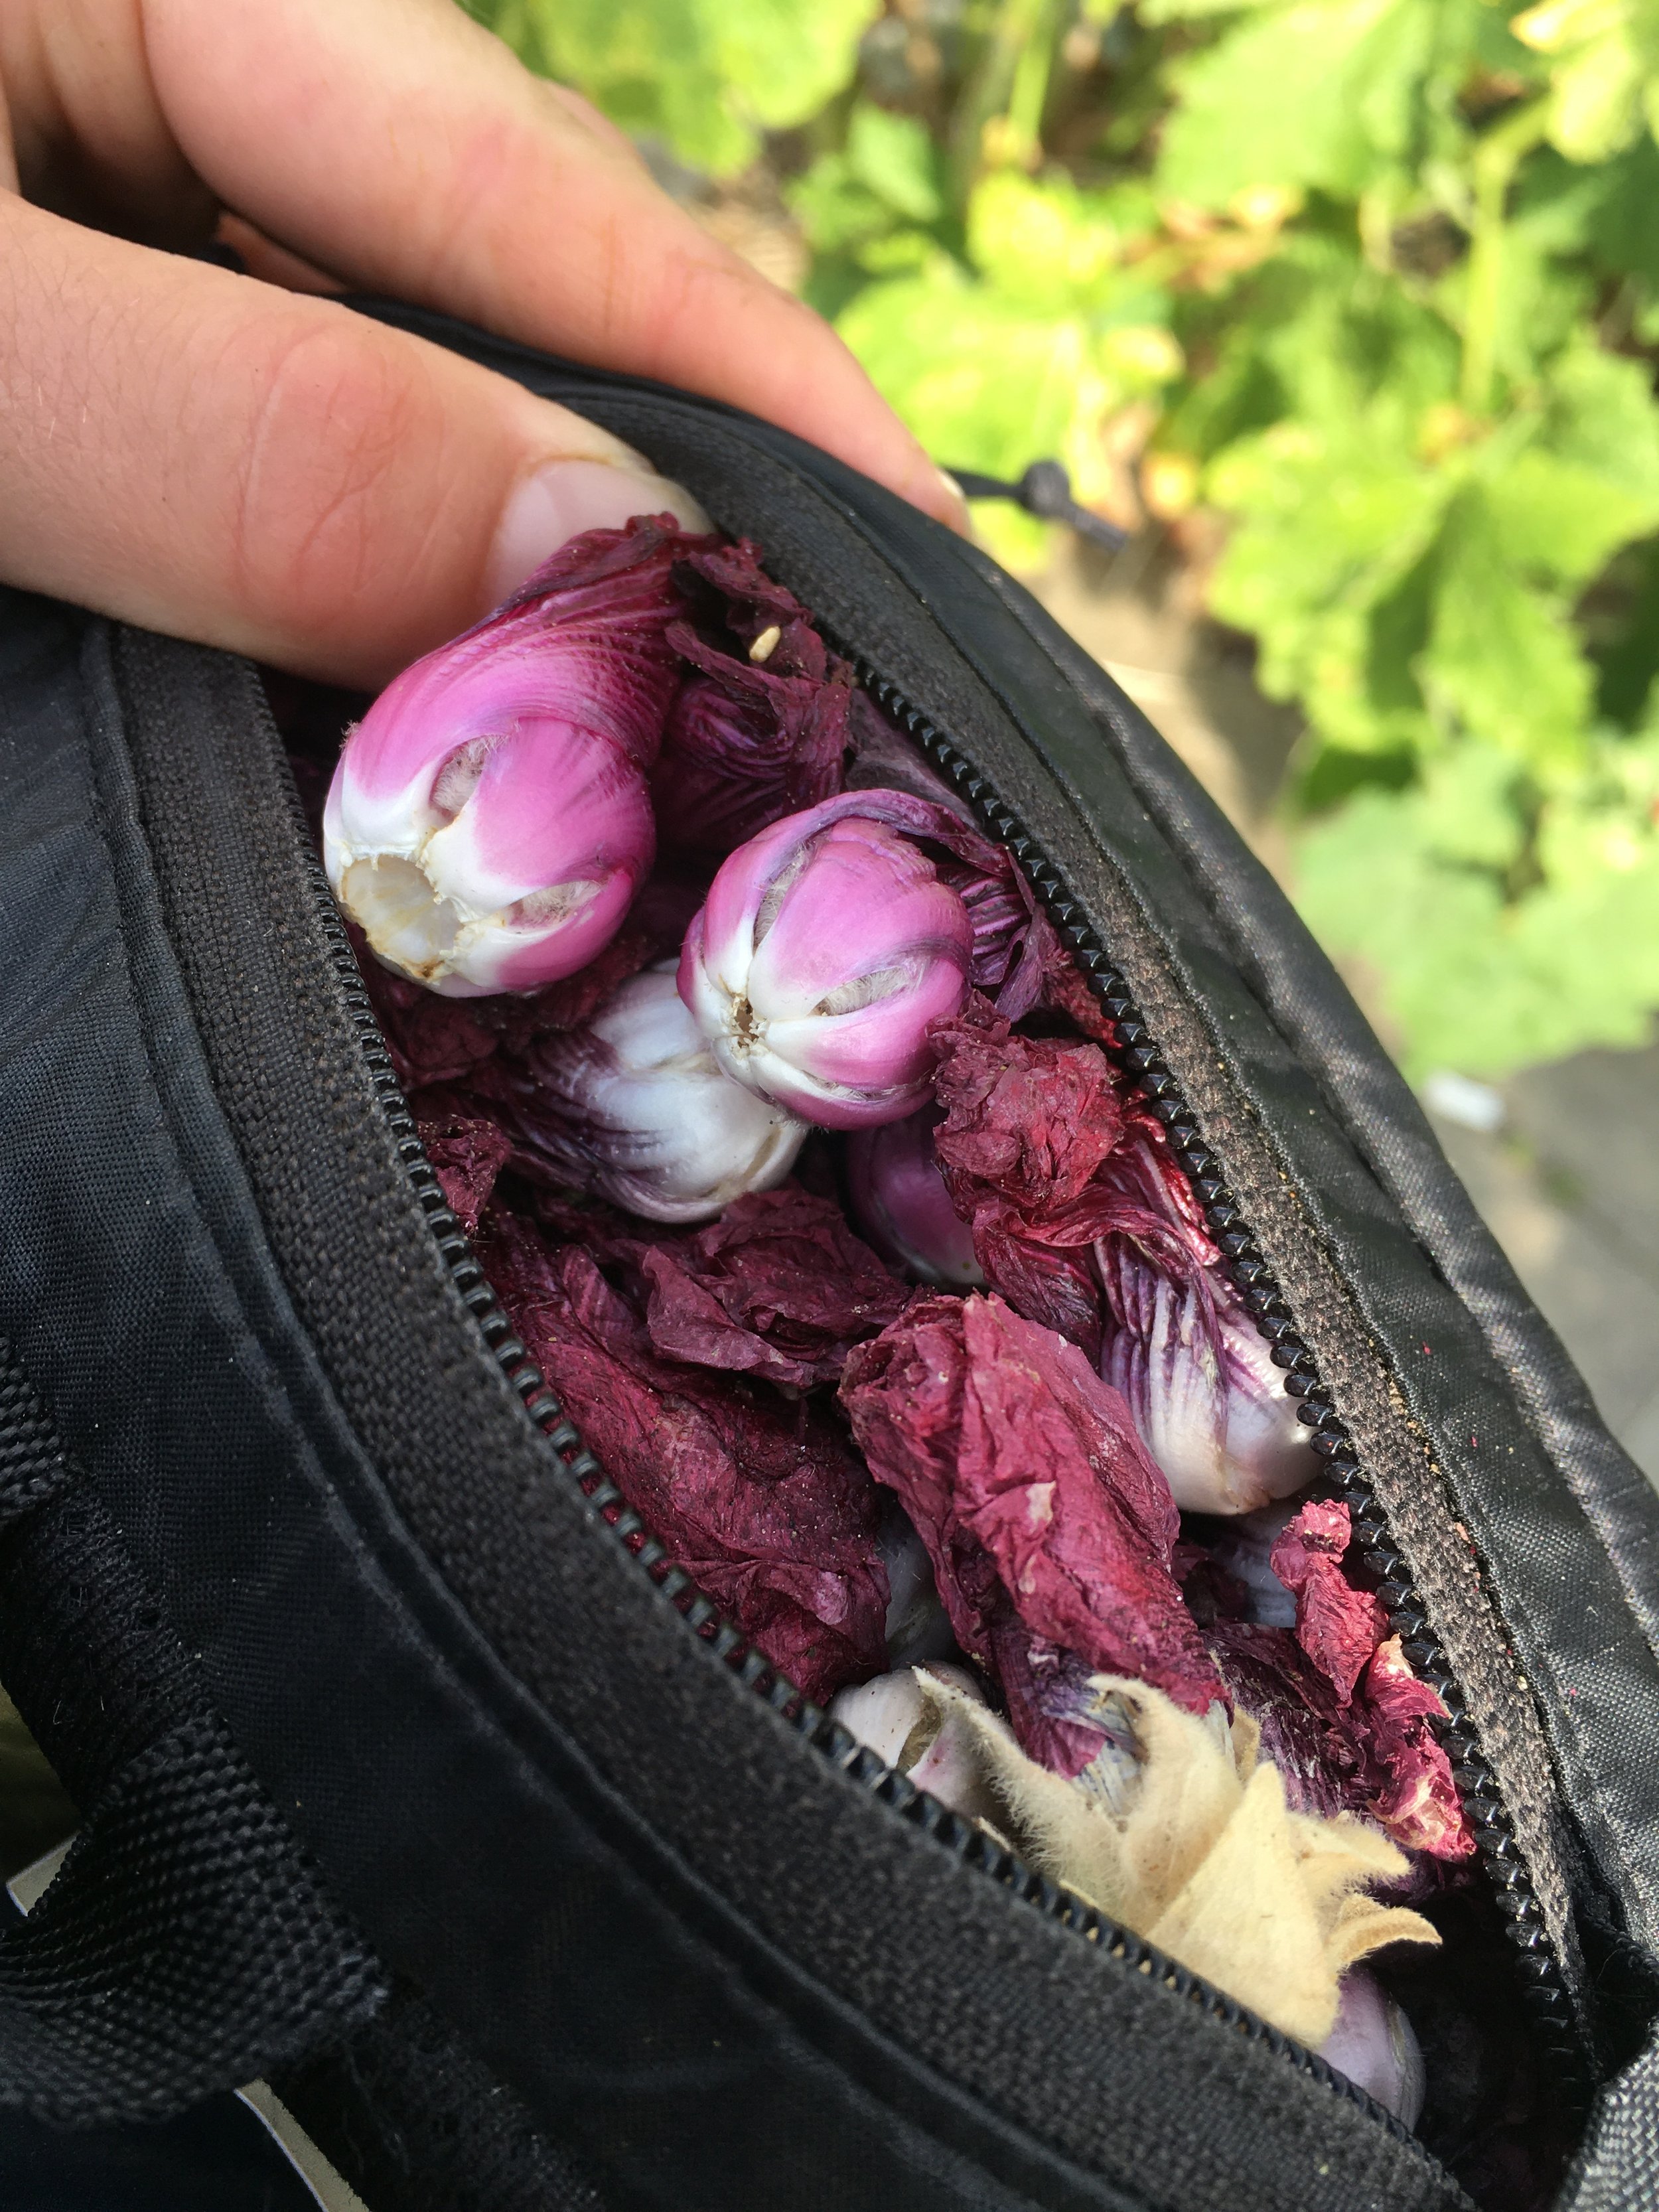
Images: 1. Plastic bags of foraged materials and bonsai snips; 2. Foraging some plant materials for printing. Feverfew and aster flowers from beside a local park’s pond; 3. A workshop participant foraging from a wild hedge by a reservoir.
Food waste best practice.
Dyeing textiles with your leftover food ingredients can be an exceptional activity, and will help you recognise the value inherent even in what we class as waste. Not all ingredients will dye, and of course you don’t want to go using cooked foodstuffs. However, there are a list of some vegetables and fruits you’ll be readily using where you will get rid of some parts, and this is what is useful for saving for bundle dyeing.
It’s also an interesting activity in terms of understanding what cultural tastes each of us have; for instance, I rarely eat pomegranates, but I do have a lot of onion skins!
Pomegranate skins — save the rind (fresh or frozen) and rip into tiny pieces. They give yellow.
Avocado skins — save the rind (fresh or frozen) and rip into tiny pieces. They give dusty pink. You could also try cutting the stones up into tiny pieces and using them.
Onion skins — save your dried peelings (fresh, don’t freeze) and rip into tiny pieces. They give brown.
Red cabbage — save any of the outer peelings that are a bit eaten (fresh or frozen) and rip into tiny pieces. It gives purple-blue.
Blackberries/Raspberries — save any that have gone a little mouldy or have been insect eaten (fresh or frozen). Use the individual berries of the whole, or the whole thing. They’ll disperse easily to give a pink or purple.
Coffee grinds — save these (fresh or frozen) and sprinkle onto your fabric. You’ll get a dusting of brown.
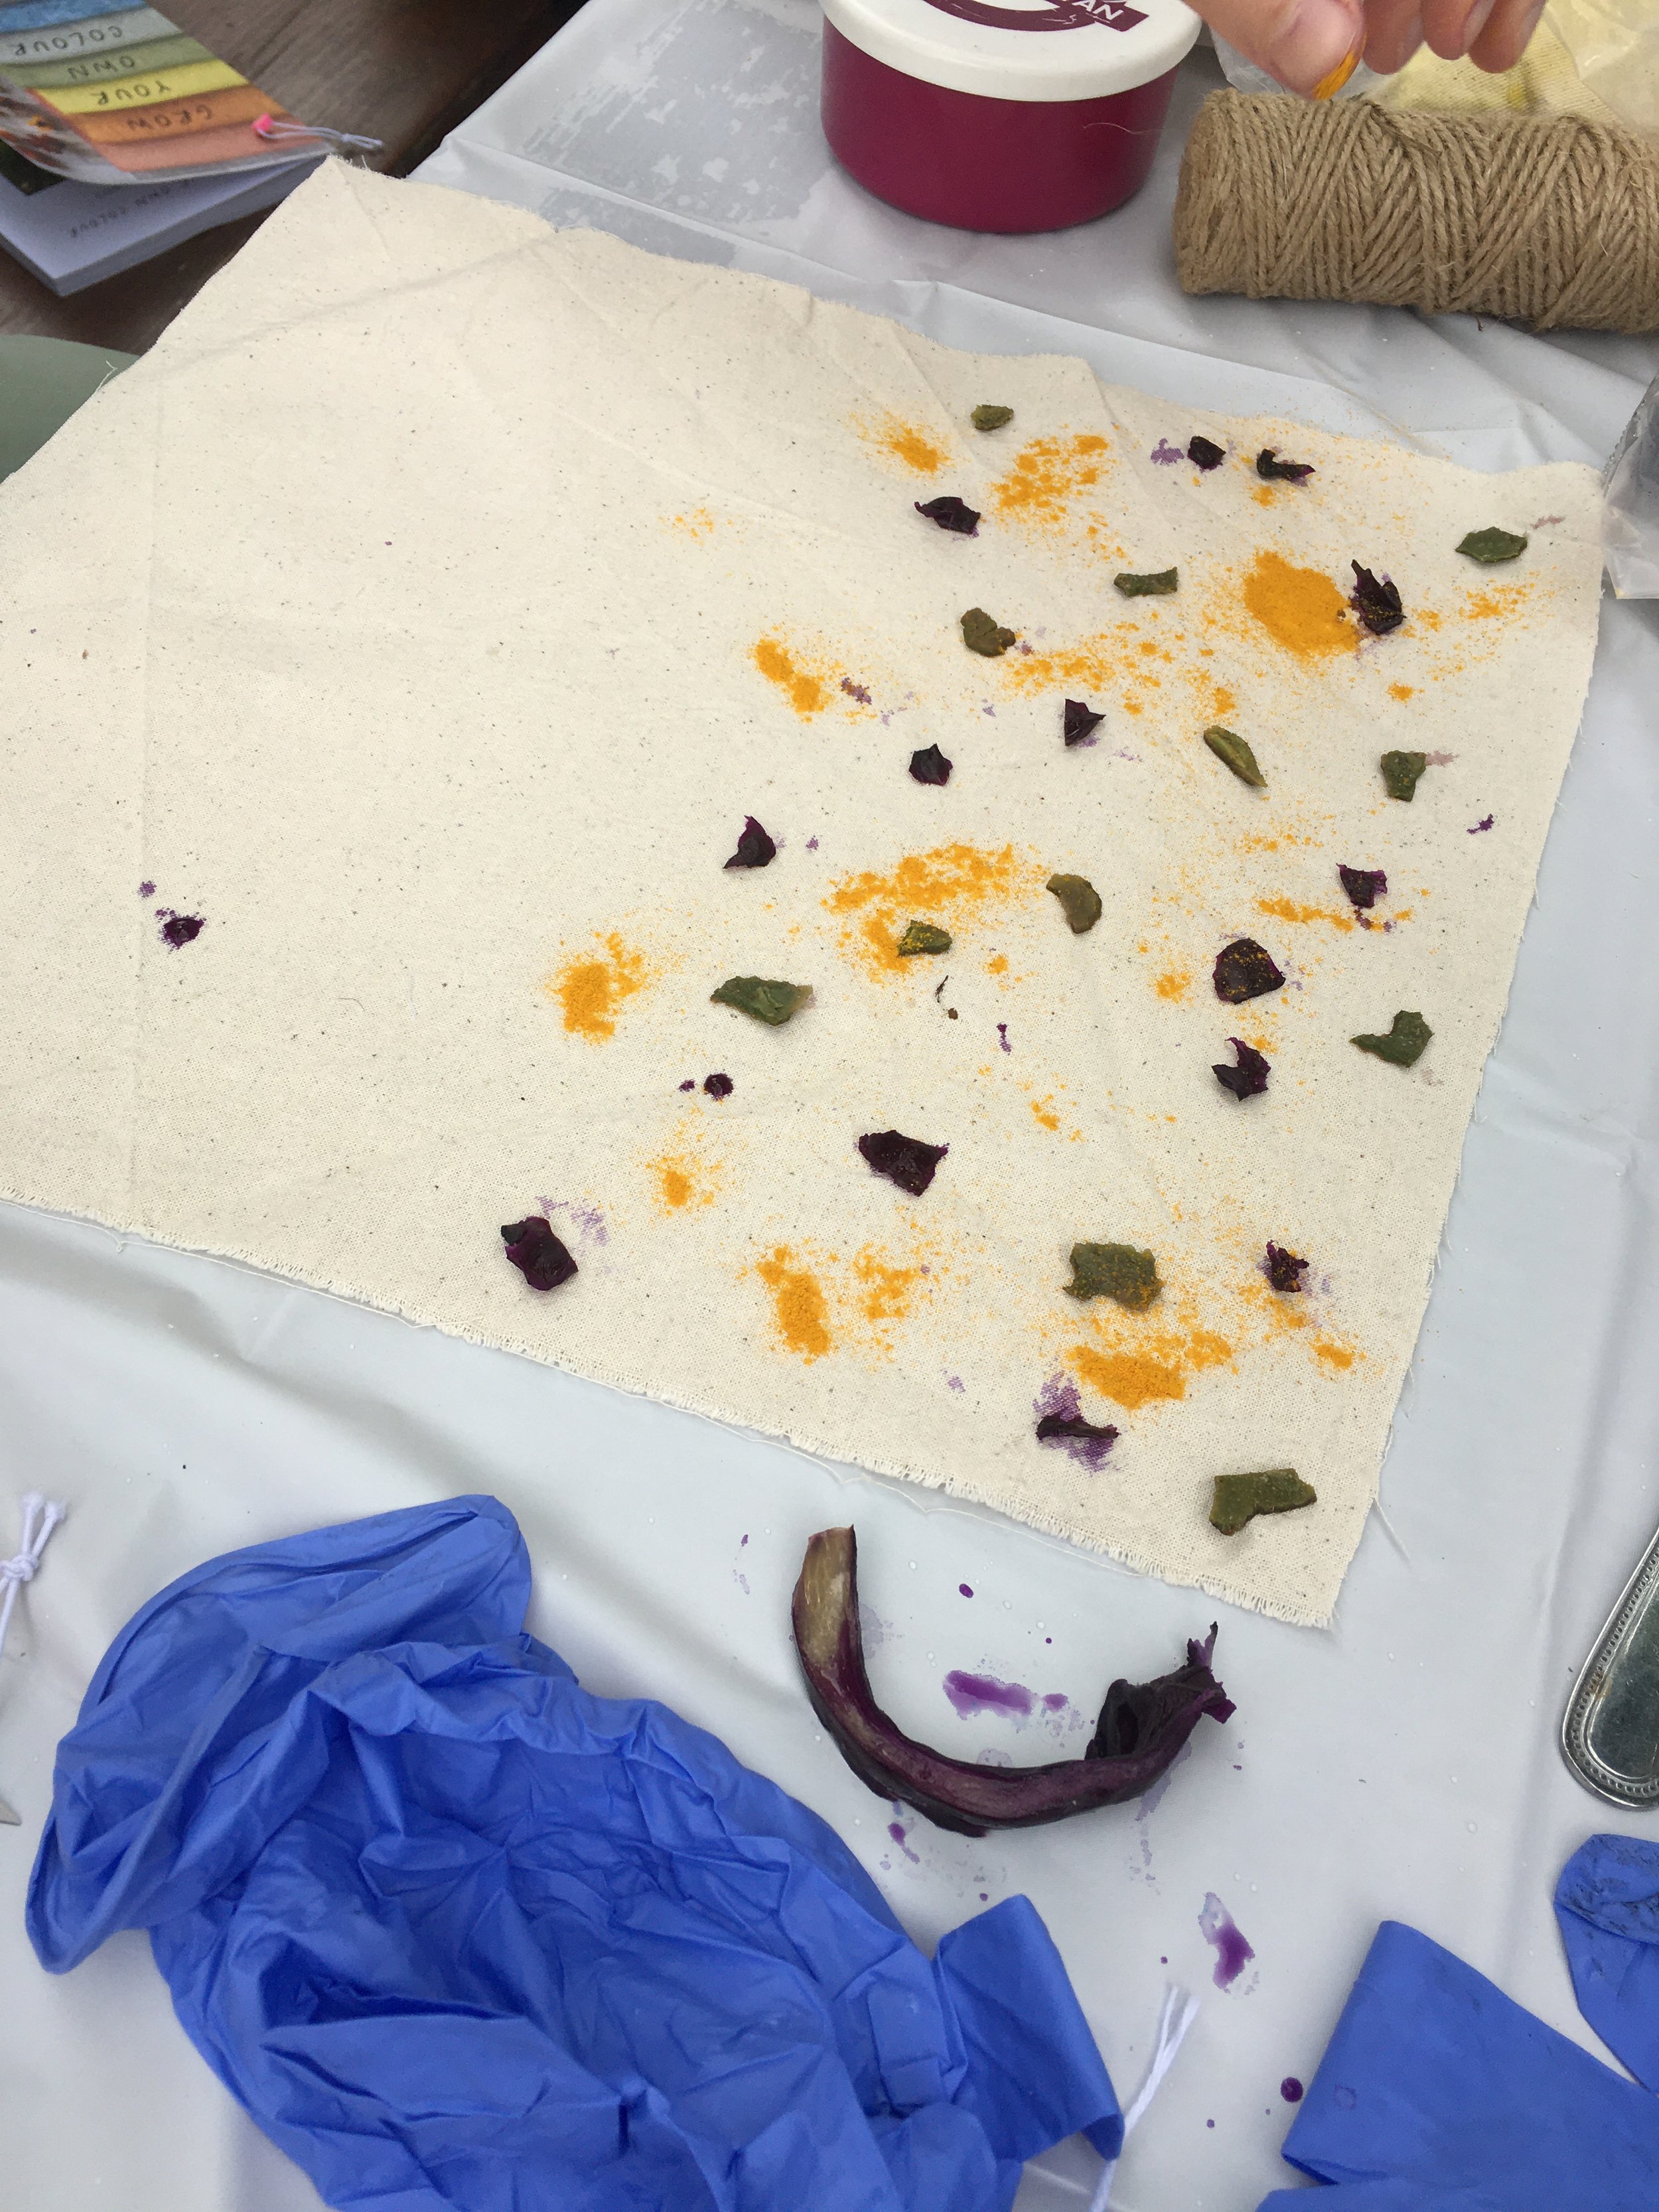
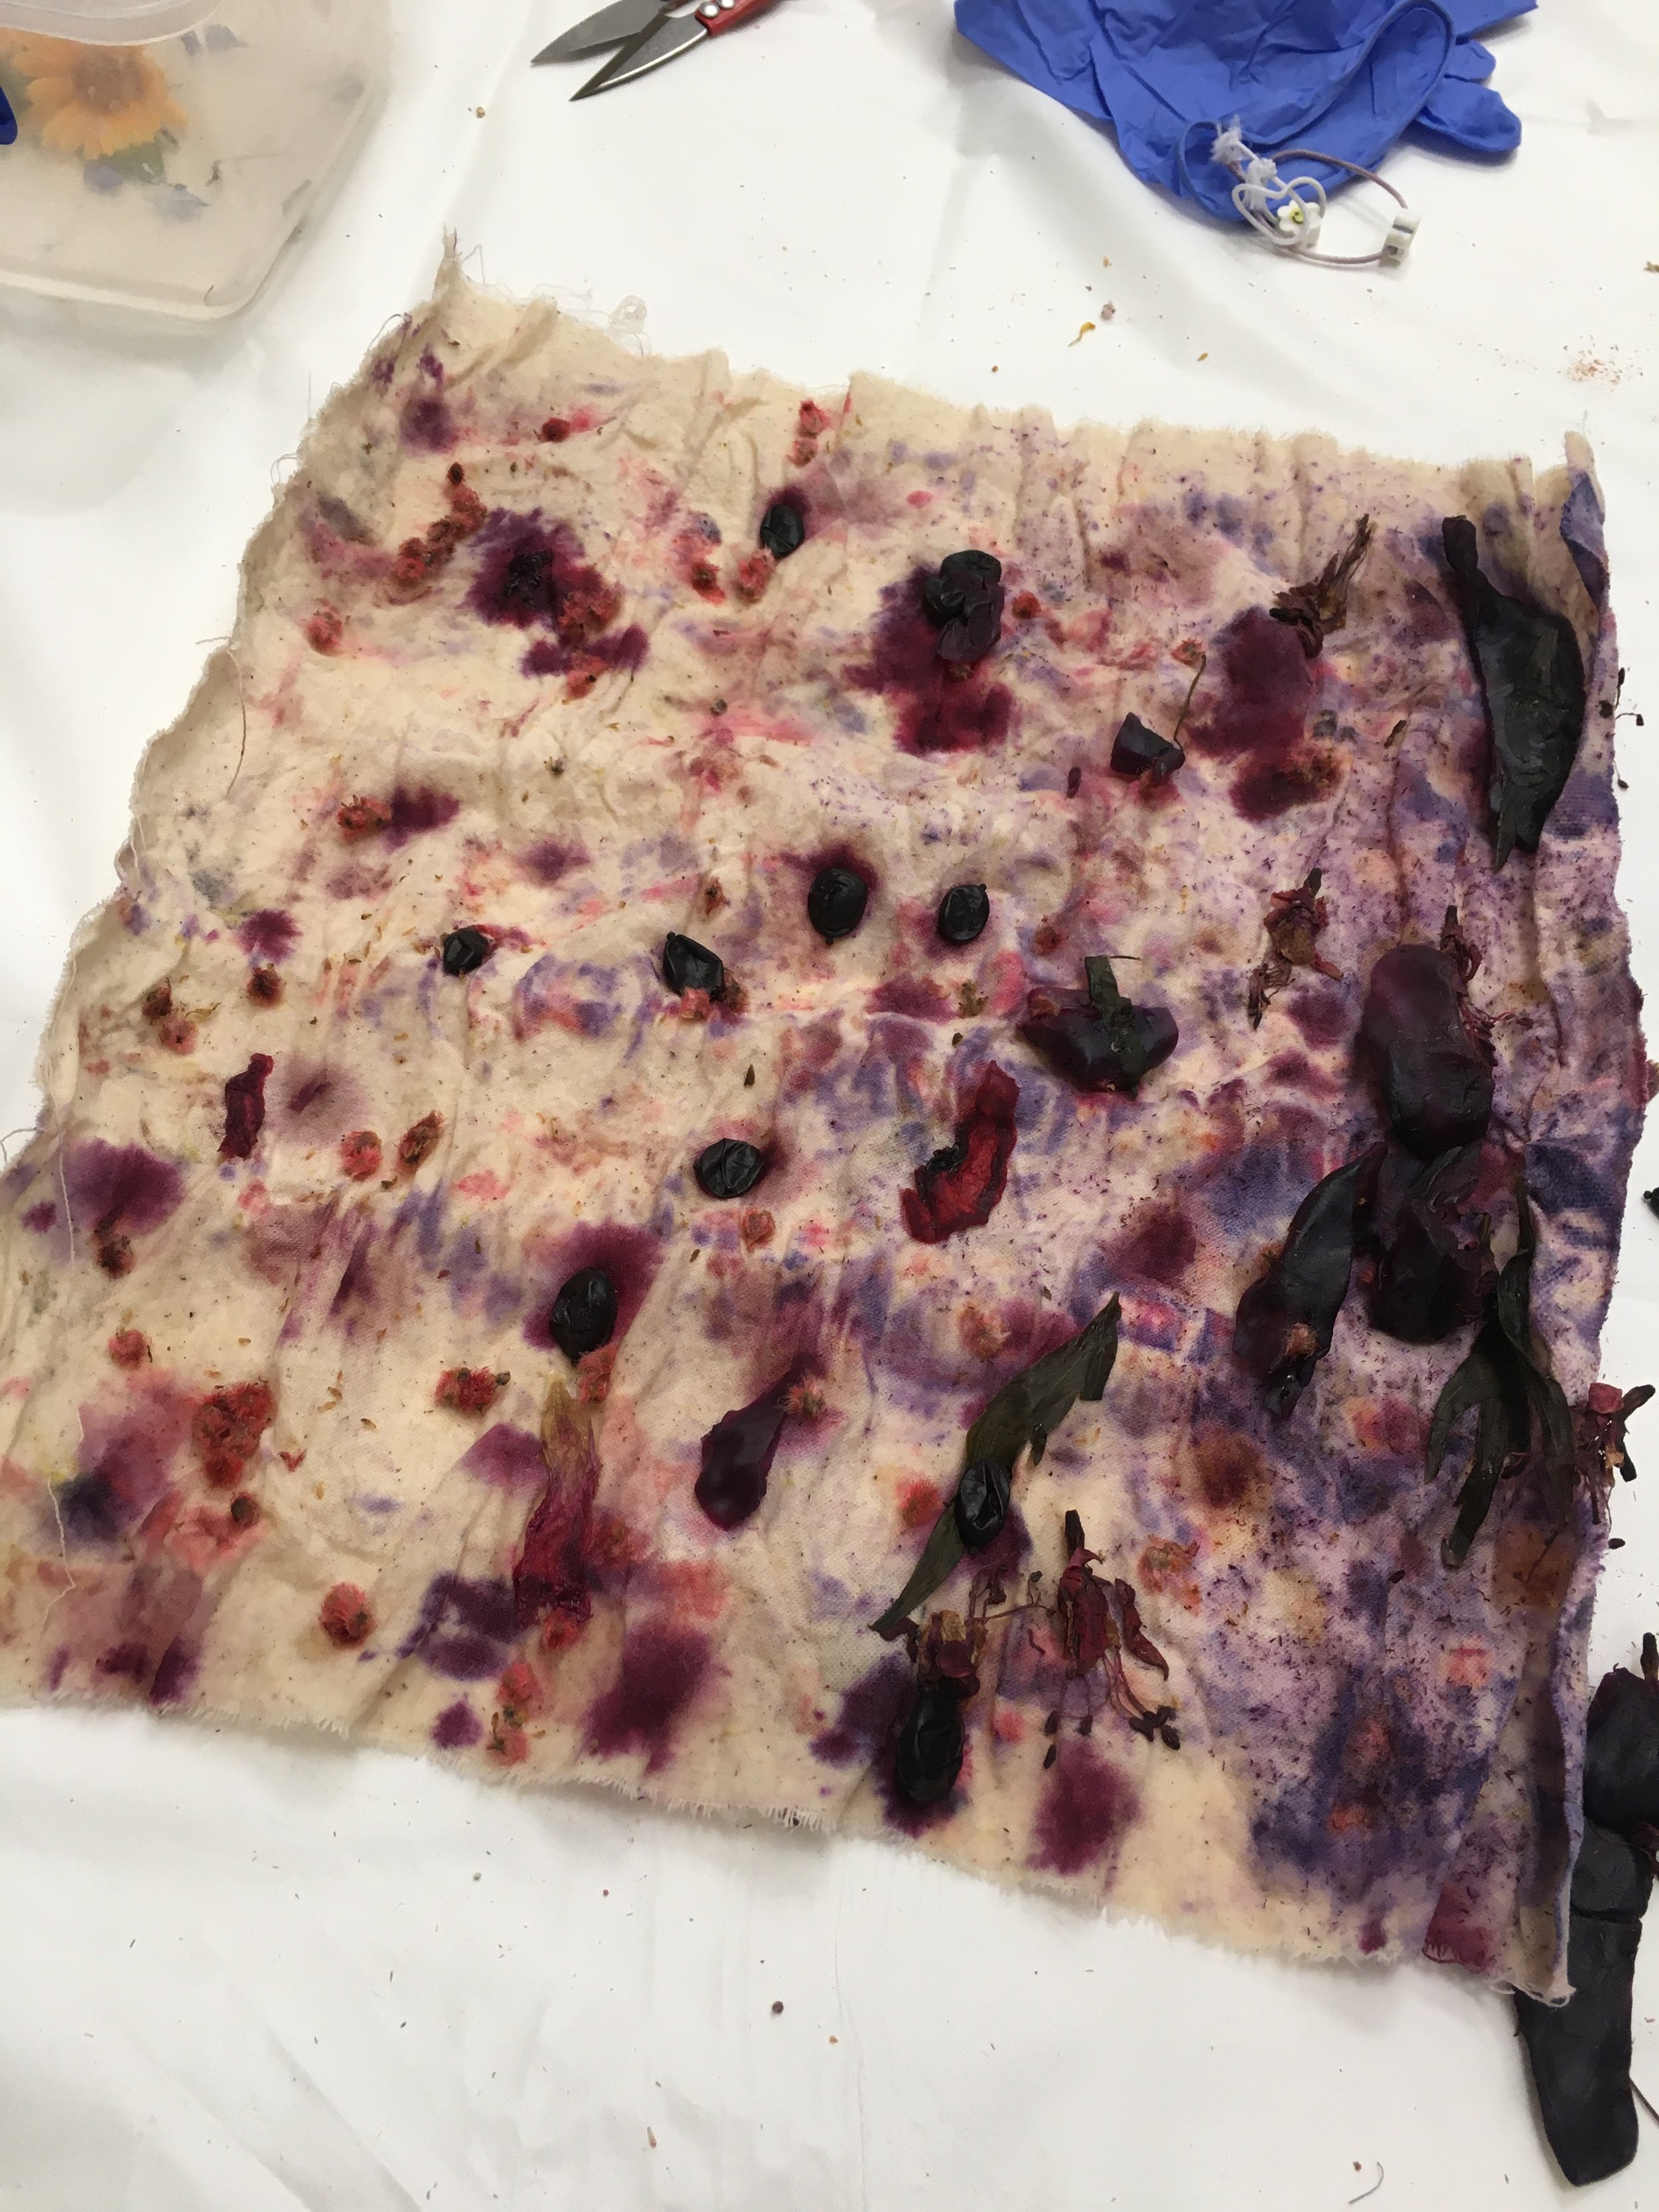

Images: 1. Food “waste” ingredients sprinkled onto the surface of a square piece of organic cotton calico; 2. Opening up a steamed bundle using food waste ingredients, including berries, red cabbage and onion skins; 3-4. Examples of a food waste bundle dye using calico.
Bundle dyeing plant choice tipS.
So when it comes to bundle dyeing, here are some tips:
☉ It’s not all about fresh plant matter. Saving and drying flowers for another day will build up your stash, and it means you don’t need to plan as much ahead as you would with hapa zome. [Dry materials from summer ready to use in winter (dry in the sun or on a dehydrator at 95˚F for 24 hours and then store in airtight plastic containers or paper bags]. You can also press your flowers between paper for later use.
☉ Don’t think you only need to harvest fresh from the plant; in fact a lot of dyestuffs come from the fallen matter (and this is a sustainable way to forage too).
☉ When a plant has started to die off, the pigment will also go. So unless you’ve been able to preserve the plant matter quickly, you’re unlikely to get a strong transfer.
☉ Watery plants tend not to print well. Things like succulents and lettuce that are mostly water won’t really transfer pigment — and your fabric will end up soggy anyway. But you also find watery-ness after a rainy day, so some petals also won’t transfer pigment.
☉ Don’t harvest on a wet day for this reason.
☉ Consider your composition before you harvest; what colours are you likely to get? Sure bundle dyeing can be about experimenting and connecting in the moment, but if you can surmise the outcome, this will help to be efficient and careful with your choices.
☉ That being said, you can expect a certain colour from a petal or leaf only to print something different; remember, we see colour differently to other organisms and so that pigment may not be truthful.
☉ Use it as playtime, but record what works and what doesn’t; what season; what the weather was doing when you harvested; what textile you’re using.
☉ If you’re using “food waste”, be especially mindful that most of these are fugitive dyes and will fade quickly with use and washing. Consider freezing your ingredients as they’ll likely go mouldy (see above).
☉ Powders can be an easy way to achieve colour, especially for colours that are difficult to find in fresh form, such as madder and logwood.
☉ If there’s something you like but are unsure it gives colour, you can always use the plant pounding technique to still achieve that colour
Bundle dyeing workshops in London.
⁕
Bundle dyeing workshops in London. ⁕
How do you print with your foraged plant materials?
Consider your patterning.
Symmetrical repeat patterns — Initial layer all over, and fold like a concertina to build up layers on each new visible bit, or fold as a square. Adding more plant matter will build up the pattern but allows more bleeding of colour. You can always do another dye later once you’ve assessed how it all looks.
Linear repeat patterns — roll as a sausage, and roll or fold.
Folding patterns — you could also try the shibori origami technique of folding and pegging to (try to) achieve resist lines through the dyes.


Images: 1. Consider where you place your plant matter on your fabric or garment as it will determine where colours are situated; 2. You can bundle in a sausage using yarn, and the yarn will also dye in patches; 3. Roll your fabric or garment any way you like, perhaps diagonally too; 4. Trying origami techniques using pegs to keep folds in place can also affect the patterning.
Process.
Pre-wet your mordanted fabric if you like
Consider your patterning
Lay your plant material on the fabric
You can use vinegar to help brighten colours (or a citric acid solution)
Use rubber bands or yarn to wrap up (can also use cling film or foil)
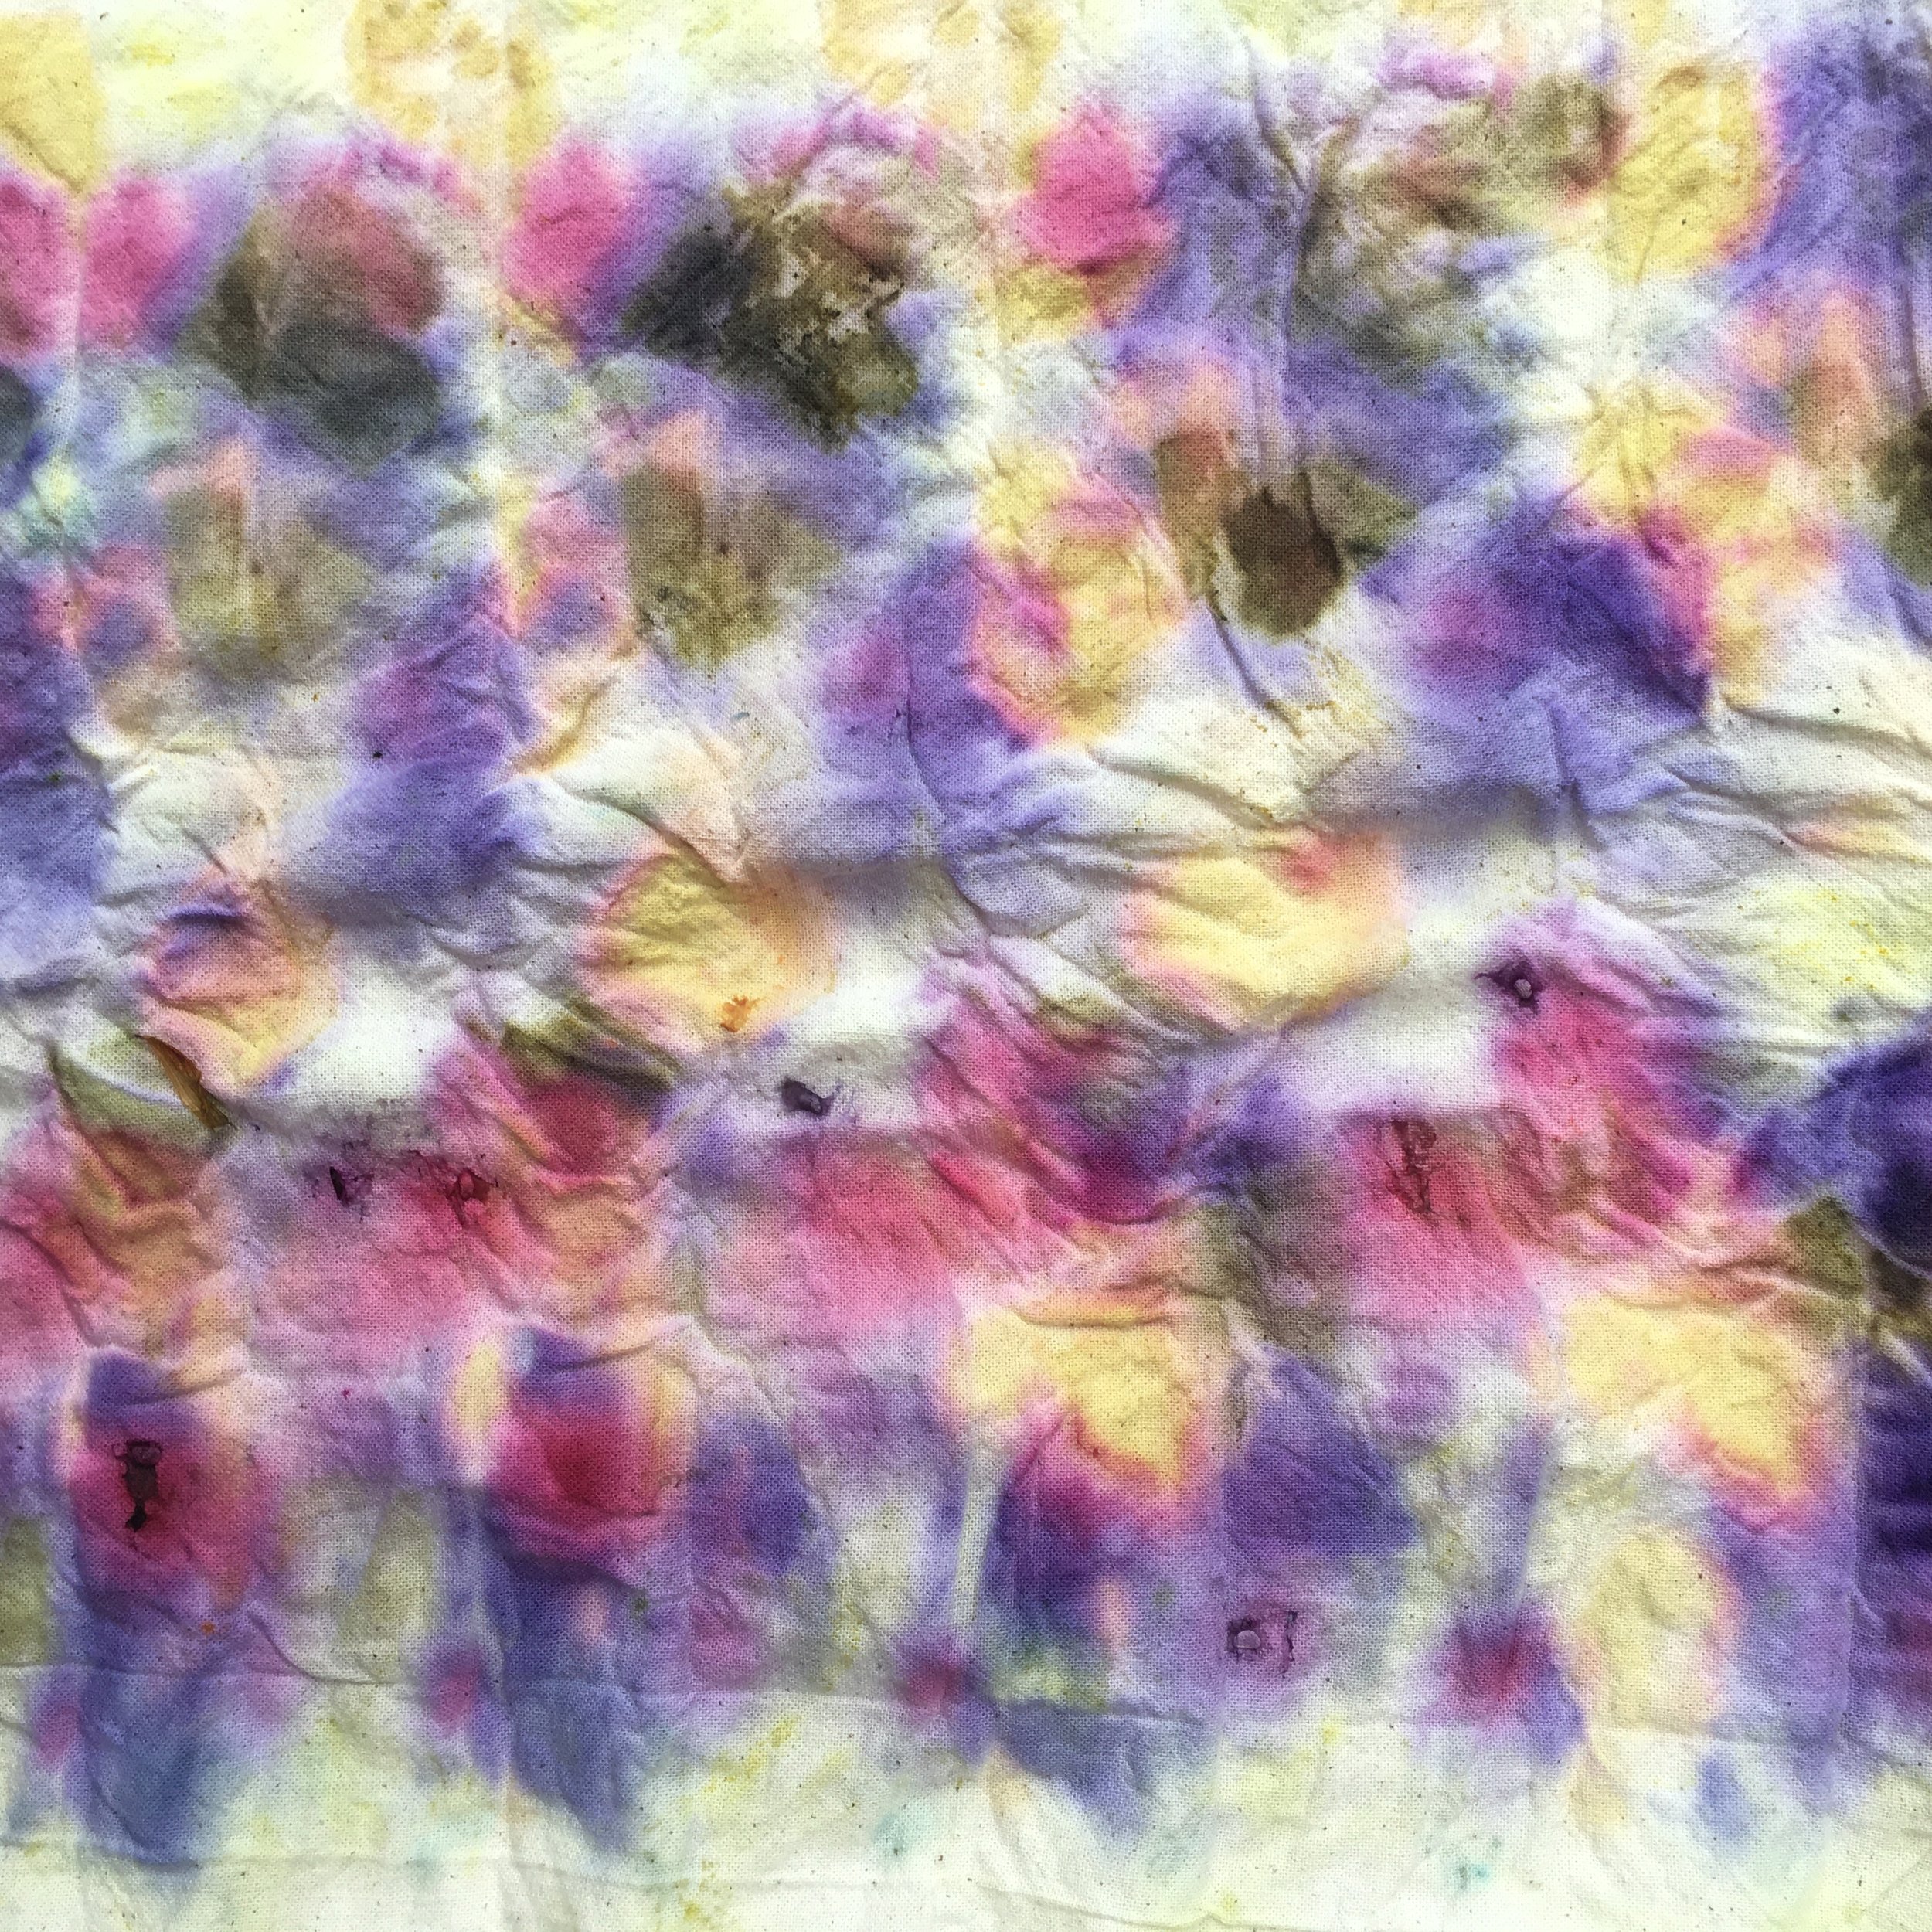
Put into your steamer pan with a lid for at least 20 minutes on a medium-high heat
Remove with tongs (be careful of steam release when you remove the lid) and let cool
Unravel and reveal!
Shake off plant matter, hang to dry
Rinse
You can heat set with a steam iron the fabric once dry
Cold dyeing / solar dyeing.
Rather than using man-made energy, utilise time and the sun’s energy.
Put your bundle in a glass jar (with lid), or a plastic bag
Leave in the sun until your start to see colour change (usually weeks)
Remove and freeze if mould starts to appear
Compost dyeing.
You might like to use the heat from your compost heap to release the dye pigments into your fabric.
Wrap your bundled textile in a protective bag - leave for few weeks or month


Images: 1-2. Plant material composed on textile and then rolled up and tied somehow; 3. Textile bundle placed into a stainless steel steamer pan for 20-30 minutes on a medium heat; 4. Let the bundle cool a little then unravel to reveal!
What fabrics do you use for plant printing?
You can use any natural fibre for bundle dyeing, though they’ll each give a unique look.
Synthetic fibres can sometimes take some colour too, especially if they’re a man-made cellulosic fibre such as viscose (rayon) and bamboo (rayon), and natural-synthetic blends also do work. However, these fibres don’t hold onto natural pigments, and require a lot of solvents in order for even synthetic dyes to stick to them.
Along with the fibre type, your fabric weave and weight, will play a role in what the finished dye will look like, so it is beneficial to experiment. For example, smooth fabrics allow for that consistency, while textured fabrics won’t allow for direct contact between plant material and all fibres in that weave. Similarly with knitted or crocheted goods, they’re bumpy and so you won’t have direct contact.
You have animal (protein) and plant (cellulose) fibres.
⇾ Silk (protein) tends to allow the colours to appear more defined and more vibrant, due to the flatter filament structure of the molecular structure.
⇾ Wool (protein) has a fuzzy structure and so is better for full-on dyeing as the pigments will wrap around the fibre and be absorbed, whereas the direct contact of plant material in bundle dyeing can make it look incomplete. Other animal hair fibres would be here too, including alpaca, camel, vicuña and yak.
⇾ Cotton (cellulose) is a much smoother and consistent molecular structure and so takes dyes similarly consistently, but can be dull in colour as pigments cannot fully penetrate (they have nothing to cling on to).
⇾ Linen (cellulose) you need to be careful of because the process of beetling can give a lustrous finish to the fabric caused by the fibre’s structure being flattened. However, unfinished or raw state linen is generally dull in tone and so plant pigments dyed directly will also be dull.
⇾ Hemp and nettle (cellulose) fabrics would be relatively dull too, though generally do come in a raw state.
⇾ Bamboo and lyocell (otherwise known as Tencel™) are very consistent and smooth man-made cellulosic fibres, but with a silkiness akin to silk and so is a vegan alternative while retaining vibrancy.
As an additional note, linen, hemp and nettle fall under the ‘bast’ fibre category too, in case you see that somewhere.
Generally, be conscious of:
Sneaky blends
Any coatings
Anything that feels sticky or rubbery


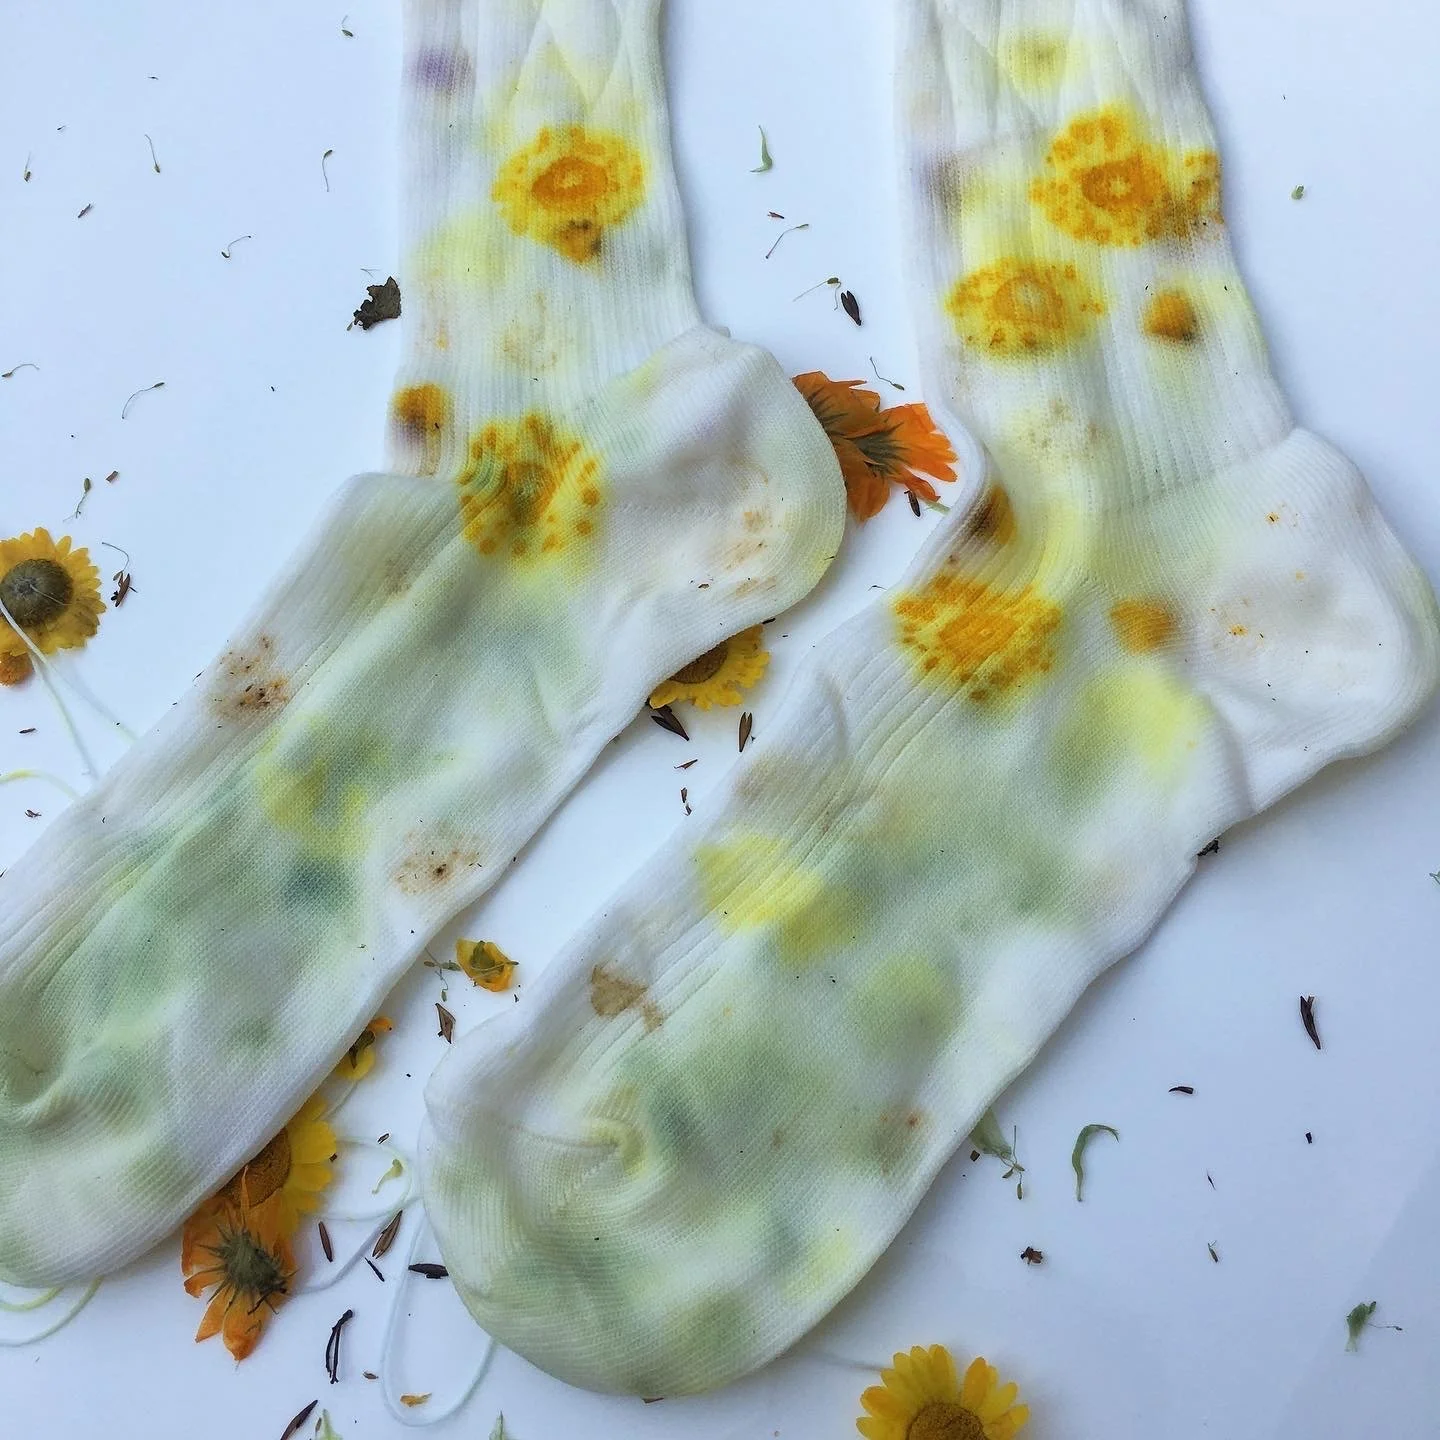

Images: 1. Selection of organic fabrics including cotton and bamboo from Organic Textile Company; 2. A heavy natural seeded cotton twill bag dyed with the tannins from elder and other leaves; 3. Pair of ribbed cotton socks dyed with dyer’s camomile and nigella flowers; 4. A piece of organic cotton poplin bundle dyed.
What equipment do you need for bundle dyeing?
Basic equipment is:
A steamer pan or insert, with lid - and water!
Pair of tongs for removing your hot bundle from the pan
Gloves for handling plant materials
Fabric (preferably mordanted)
Plant material (fresh or dried, and perhaps powdered dye extracts)
Rubber bands or yarn for tying (or aluminium foil or cling film)
Somewhere to hang your textiles
Preferably some fresh air, or wear a mask [for the mordanting process]
Can you print on existing clothing?
Yes!
Bundle dyeing is a special way to update existing clothing through upcycling. Anything that is stained or grubby, or that you’re simply bored of, can be updated with fresh colour.
Tips:
Lighter colour garments will show up dyes better; dark-coloured garments are for obvious reasons going to be pointless to use.
Natural fibre garments will allow the plant pigments to stick better, but it is possible to dye blends.
Avoid anything coated, such as waterproofs, as not only could the steam break down these coatings, you won’t achieve a longlasting dye transfer.
Wash your garment beforehand to remove oils, grease and sweat that can block the pigment from transferring to the fibre.
It is best if you mordant your garment to help the dyestuffs absorb and stick to your fibre.


Images: 1. A grubby poly-cotton shirt updated with dried and fresh flowers using the bundle dyeing technique; 2. Socks dyed with dried eucalyptus leaves; 3. Socks first dyed with blackberry and then overdyed with bundle dyed dried hollyhock petals; 4. Socks dyed by a workshop participant using dried French marigold flowers. (Socks are a popular choice because they’re quick, easy and fun to wear!)
How do you care for your bundle dyed artwork?
Bundle dyed pieces are mini artworks, and can be simply put in a frame and kept, or you can use the item. It is good practice to consider your application before you start to dye, as it may shift what mordants, fabric and dyestuffs you use, however, sometimes you just want to have playtime!
All naturally-dyed items need to ideally be kept out of direct sunlight to retain the pigments, though you can watch them fade over time if you do leave them in sunlight and this can be quite nice as a sign of passing time and season.
Steaming with an iron can help to set the colour.
You may also want to hand wash in cold water first to remove any final plant bits.
It will fade in light and generally at different temperatures too, so avoid direct sunlight - unless you want to see this change occur quicker.
You could hang it as a piece of artwork in a frame, or simply use it as a handkerchief and eventually use the cloth again for a fresh artwork.
When bundle dyeing existing clothing or accessories, be aware that extended washing will fade the print quicker, so perhaps choose an item that can be washed less. Unless, again, you’re ok with watching this change.
Choose a pH neutral and low impact detergent/soap to help retain colours for longer.